
Tiny ants invading your home create frustration and health concerns. Whether they’re foraging in your kitchen, appearing in bathrooms, or trailing through your bedroom, small ants signal a colony nearby that requires action.
This guide provides practical, tested methods to eliminate tiny ants permanently, from identification to prevention, so you can reclaim your home without unnecessary delay or expense.
Featured Snippet
To get rid of tiny ants, locate their entry points and trails, then apply ant baits or natural treatments like borax or diatomaceous earth along their paths. Remove food sources, seal cracks, and repeat treatments for 7-14 days until all ants disappear. For persistent infestations, contact a professional pest control service.
Before You Begin
Difficulty Level: Beginner to Intermediate
Time Required: 30 minutes to set up; 7-14 days for complete elimination
Estimated Cost: $10-$50 for DIY; $200-$500+ for professional treatment
DIY vs. Professional: DIY works for most cases; hire professionals if the infestation persists after two weeks or if you prefer hands-off solutions.
Choosing the Right Approach
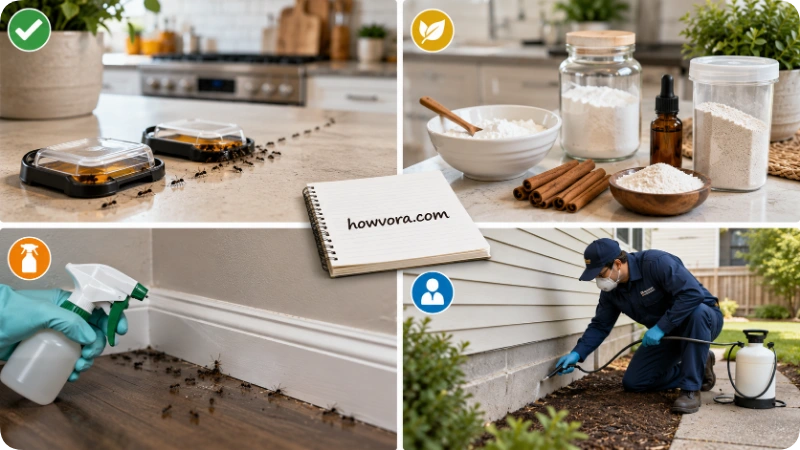
Different methods suit different situations. Understanding your options prevents wasted time and money.
Method Comparison
Ant Baits (DIY Chemical)
Pros: Highly effective, kills the queen, inexpensive, works within days
Cons: Slight delay before results, requires correct placement
Best for: Most home ant infestations
Natural Treatments (Borax, Diatomaceous Earth, Cinnamon)
Pros: Non-toxic, safe for pets and children, environmentally friendly
Cons: Slower results, requires more frequent reapplication, less reliable for large colonies
Best for: Homes with pets or young children, preventative maintenance
Ant Sprays (Contact Insecticides)
Pros: Kills ants on contact, with immediate visible results
Cons: Don’t eliminate the colony, ants return quickly, requires repeated applications
Best for: Emergencies or spot treatment only
Professional Pest Control
Pros: Guaranteed results, thorough colony elimination, long-term prevention
Cons: Higher cost, scheduling required, chemical application in your home
Best for: Severe infestations, recurring problems, or preference for professional handling
Why Ant Baits Are Recommended:
Baits are the most effective DIY solution because ants carry poison back to the colony, eliminating the queen. Without the queen, the colony cannot reproduce and dies completely. This addresses the root problem rather than just killing visible ants.
At a Glance
| Aspect | Details |
| Difficulty | Beginner (baits) to Intermediate (natural methods) |
| Time to Results | 3-7 days (baits) to 14-21 days (natural treatments) |
| Cost | $10-$50 DIY; $200-$500+ professional |
| Repeat Frequency | Every 7-14 days until infestation stops |
| Success Rate | 85-95% with proper application |
Things You’ll Need
| Item | Purpose |
| Ant baits (gel or liquid) | Kill the colony by targeting the queen |
| Small containers or traps | Hold baits along ant trails |
| Borax (optional) | Natural alternative to commercial baits |
| Diatomaceous earth (optional) | Natural contact insecticide |
| Caulk or sealant | Close entry points and cracks |
| Caulking gun | Apply sealant to gaps |
| Cleaning supplies (vinegar, water) | Remove pheromone trails |
| Ant spray (optional) | Immediate kill of visible ants |
| Gloves | Protect hands during application |
| Flashlight | Find ant entry points and nests |
Safety Precautions
For Baits and Chemical Treatments:
Keep all pesticides away from children and pets. Store baits in locked cabinets or high shelves. Wear gloves when handling chemical products. Wash hands thoroughly after application. If accidental ingestion occurs, contact Poison Control immediately.
For Diatomaceous Earth:
Use food-grade only (never pool-grade). Wear a dust mask when applying powder forms to avoid inhalation. Apply in thin, dry layers. Diatomaceous earth loses effectiveness when wet, so reapply after cleaning.
For Natural Treatments:
Borax is toxic if ingested in large quantities; use only where children and pets cannot access. Some essential oils attract pets; verify safety before using cinnamon or other aromatics.
General Safety:
Ensure adequate ventilation when using any chemical spray. Do not apply treatments on food preparation surfaces; wipe areas with food-grade vinegar solution afterward. Never mix different insecticides.
Step-by-Step Guide
Step 1: Identify the Ant Type and Entry Points
What to do:
Use a flashlight to trace ant trails from where you see them to where they enter your home. Common tiny ants include pharaoh ants (light tan, 1-2mm), ghost ants (light colored with dark rear), and sugar ants (small, brown, attracted to sweets). Photograph the trails and entry points.
Why it matters:
Different ant species require different treatment strategies. Pharaoh ants avoid strong-smelling baits; ghost ants need specific moisture conditions. Knowing entry points prevents repeated invasions from the same location.
What success looks like:
You’ve mapped at least one clear trail and identified 2-3 entry cracks or gaps.
Common beginner mistakes:
Assuming all tiny ants are the same species, ignoring small cracks as entry points, focusing only on visible ants rather than finding the nest.
Step 2: Clean Food Sources and Remove Pheromone Trails
What to do:
Thoroughly clean all surfaces where ants have traveled using a 50/50 mixture of white vinegar and water. Wipe down baseboards, countertops, and under appliances. Remove crumbs, grease, and sticky residue. Store all food in sealed containers. Empty garbage and recycling daily.
Why it matters:
Pheromone trails are chemical highways ants use to communicate. Vinegar disrupts these trails, forcing ants to find new paths. Removing food eliminates the reason ants invaded and prevents new colonies from establishing.
What success looks like:
Surfaces are clean and dry, visible ant trails have vanished, and you haven’t seen new ants in the area you cleaned within one hour.
Common beginner mistakes:
Cleaning only visible ants without removing trails, leaving food out during treatment, skipping under appliances where ants hide.
Step 3: Apply Ant Baits Along Entry Points and Trails
What to do:
Place ant baits in small dots (about the size of a pea) along the ant trails you identified, near entry points, and in corners where ants congregate. If using gel baits, squeeze small dots onto paper or cardboard to avoid direct contact with surfaces. For liquid baits, use the applicator bottles provided. Space bait stations 12-18 inches apart along trails.
Why it matters:
Baits attract ants immediately. They pick up the poison, return to the colony, and spread it to thousands of other ants, including the queen. This eliminates the entire colony, not just visible foragers.
What success looks like:
Ants swarm the baits within 1-2 hours, showing high interest. You should see noticeably fewer ants after 3 days and almost no ants after 7 days.
Common beginner mistakes:
Spraying ants dead before they reach baits (prevents bait consumption), moving bait stations before ants have used them, using only one bait type when ants show no interest, giving up after 2-3 days.
Step 4: Seal Entry Points and Cracks
What to do:
Using caulk and a caulking gun, seal all cracks, gaps, and entry points you identified. Focus on baseboards, around pipes, where walls meet floors, and around window frames. Check both interior and exterior. Allow caulk to dry according to product instructions (typically 24-48 hours).
Why it matters:
Sealing entry points prevents new ant colonies from entering your home. It also protects your effort by cutting off reinforcements from outside colonies.
What success looks like:
All visible gaps are sealed. No new ants appear at previously identified entry points.
Common beginner mistakes:
Only sealing obvious large cracks while missing tiny gaps (ants fit through spaces smaller than a pencil lead), sealing while ants are still actively using the entry point, not checking for multiple entry points.
Step 5: Repeat Bait Applications
What to do:
Reapply baits every 7 days for up to 4 weeks if ants persist. Some colonies are larger or more resistant than others. Fresh baits maintain effectiveness and catch any survivor ants before they rebuild.
Why it matters:
Large colonies may have multiple queens or develop resistance. Repeated applications ensure complete elimination.
What success looks like:
After the second application, you see 90% fewer ants. By the third application, ants should be virtually gone. Four weeks of bait use guarantees colony death.
Common beginner mistakes:
Stopping treatment too early (ants return after 5 days), applying too frequently (wasting product), using expired baits that have lost potency.
How to Know You Did It Correctly
Signs of Success:
Ants disappear from treated areas within 7-10 days. No new ant trails appear after two weeks. You find no dead ants clustered in corners (which indicates the colony died nearby). Food stays untouched by ants for extended periods. No ants appear at previously sealed entry points.
Verification Methods:
Place a small amount of sugar or honey on a plate in the affected area. If no ants appear within 30 minutes, infestation is eliminated. Set out bait stations for one week; if ants ignore them, the colony is dead. Inspect entry points weekly for new activity.
Expected Results:
Complete elimination typically occurs within 14-21 days for small infestations and 21-30 days for moderate infestations. Some stragglers may appear for up to a month after colony death as they slowly die off.
Expected Timeline and Results
Days 1-2: Ants swarm baits immediately. Some visible ants die from spray if used, but the colony is still active.
Days 3-5: Noticeable reduction in ant activity. Fewer ants appear in kitchens and bathrooms. The queen begins dying as poisoned ants return to the nest.
Days 7-10: Ant populations drop dramatically. 80-90% reduction is normal. Some small colonies are completely eliminated at this stage.
Days 14-21: Remaining ants disappear. Stragglers appear occasionally but pose no colony threat. Success is nearly guaranteed.
Days 21-30: Zero ant activity in most cases. Any ants you see are isolated survivors from surviving micro-colonies or new invasions from outdoors (sealed entry points prevent this).
When to Repeat or Switch Methods:
If ants persist after 14 days of baiting, try a different bait brand (ants show taste preferences). If activity continues after 21 days, the colony may be resistant; contact a professional. Unless you see ants reappearing at sealed entry points, your caulking failed; inspect and reseal.
Alternative Methods
Borax and Powdered Sugar (Natural DIY)
How it works:
Mix equal parts borax and powdered sugar with three parts water to make a paste. Apply small dots near ant trails and entry points. Ants consume the mixture and carry it to the colony, poisoning the queen.
Advantages:
Non-toxic to humans and pets, inexpensive ($5), environmentally friendly, no chemical odors.
Disadvantages:
Slower results (14-21 days), less reliable than commercial baits, requires reapplication after cleaning or rain, messy if not carefully applied.
Best use case:
Homes with young children or pets, preventative maintenance, areas where commercial baits are prohibited.
Diatomaceous Earth (Natural Contact Insecticide)
How it works:
Food-grade diatomaceous earth damages the ant exoskeleton, causing dehydration and death. Sprinkle fine powder along ant trails, entry points, and baseboards.
Advantages:
Non-toxic, safe for pets and children, long shelf life, works on contact.
Disadvantages:
Must remain dry to work (loses effectiveness when wet), takes 5-7 days for full effect, requires frequent reapplication, visible powder residue, less effective on large colonies.
Best use case:
Dry areas like inside cabinets, preventative barrier treatments, when chemical sensitivity is a concern.
Cinnamon and Essential Oils (Repellent)
How it works:
Strong-smelling spices and oils deter ants from entering. Sprinkle cinnamon or apply essential oils (peppermint, clove) along baseboards and entry points.
Advantages:
Pleasant smell, safe for all household members, non-toxic, inexpensive.
Disadvantages:
Repels rather than eliminates ants (they return elsewhere), does not kill the colony, requires very frequent reapplication (every few days), inconsistent effectiveness.
Best use case:
Preventative maintenance after successful elimination, deterring ants from specific rooms, when elimination is not urgent.
Professional Pest Control
How it works:
Licensed exterminators apply professional-grade baits, growth regulators, and perimeter treatments. They identify colony locations and eliminate them at the source.
Advantages:
Guaranteed results, comprehensive treatment, long-term prevention, no effort required, professional expertise diagnoses unusual infestations.
Disadvantages:
High cost ($200-$500+), scheduling required, chemical application in your home, may require multiple visits.
Best use case:
Severe infestations affecting entire homes, repeated DIY failures, preference for guaranteed results, time constraints.
Common Mistakes to Avoid
Mistake 1: Killing Ants Immediately With Spray
What it is:
Spraying ants with insecticide to see them die immediately.
Why it happens:
Satisfying to see instant results; spray kills visible ants quickly.
Consequences:
Ants never reach baits, so they never poison the colony. The colony survives and ants return within days.
How to prevent it:
Resist using spray on bait stations. Reserve spray only for direct contact with ants far from baits.
Mistake 2: Applying Baits to Wet Surfaces or After Cleaning
What it is:
Placing baits on damp baseboards or immediately after washing floors.
Why it happens:
You want to start treatment immediately after cleaning.
Consequences:
Moisture degrades baits, reducing effectiveness. Ants avoid wet areas, ignoring the baits.
How to prevent it:
Wait 24 hours after cleaning before applying baits. Ensure all surfaces are completely dry. Reapply baits in dry locations only.
Mistake 3: Not Sealing Entry Points
What it is:
Treating the infestation without blocking how ants enter.
Why it happens:
Focus is on killing visible ants; entry points seem secondary.
Consequences:
New ants enter continuously from outside colonies, undoing your treatment progress.
How to prevent it:
Simultaneously treat and seal. Identify all entry points before starting baits.
Mistake 4: Using Outdated or Expired Baits
What it is:
Applying baits that have lost potency due to age or improper storage.
Why it happens:
Using leftover baits from previous years or baits stored in heat/humidity.
Consequences:
Ants ignore ineffective baits. Treatment fails despite correct application.
How to prevent it:
Check expiration dates before purchasing. Store baits in cool, dry places. Replace baits yearly.
Mistake 5: Moving Bait Stations Too Quickly
What it is:
Relocating or removing baits after 2-3 days because ants haven’t disappeared.
Why it happens:
Impatience or misunderstanding that colony death takes time.
Consequences:
Baits work over 7-14 days, not immediately. Moving them prevents the poison from reaching the colony.
How to prevent it:
Leave baits untouched for at least 7 days. Expect to see fewer ants only after 5-7 days.
Why Many Attempts Fail
Reason 1: Treating Multiple Entry Points Incompletely
Many homes have 5-10 ant entry points. Treating some but not others creates partially successful results. Ants simply switch to untreated entry points. Solution: Map your entire home systematically, sealing every gap before or immediately after baiting.
Reason 2: Underestimating Colony Size
Small visible ants suggest small colonies, but pharaoh ant colonies can contain 300,000+ ants across multiple nests. One month of baiting eliminates only slightly larger colonies that split into multiple breeding groups to avoid poison. Solution: Continue baiting for the full 4-week cycle even if results appear successful at week 2.
Reason 3: Ants Avoid Unfamiliar Baits
Different ant species prefer different bait formulations. Some prefer gel; others prefer liquid. Some avoid strong-smelling baits. If baits sit untouched, your colony rejects that formulation. Solution: Start with the most common formulation for your ant type, then switch brands after 5 days if ants ignore baits.
Reason 4: Disrupting the Colony Before the Queen Dies
Aggressive spraying, vacuuming, or disturbing known nest locations scatters the colony, causing it to split or relocate. Scattered ants form new nesting sites and restart the cycle. Solution: Avoid disrupting suspected nest areas. Let baits work undisturbed for 2 weeks before investigating.
Reason 5: Food and Water Sources Remain Available
Ants persist if kitchens offer crumbs, grease, or water. Baits become secondary food compared to abundant kitchen resources. Solution: Implement rigorous cleaning daily and fix water leaks before baiting.
Reason 6: Identifying the Wrong Ant Species
Carpenter ants, pavement ants, and odorous house ants require different strategies than tiny sugar ants. Misidentification leads to wrong bait selection or incorrect expectations for treatment duration. Solution: Photograph ants and verify species before starting treatment.
Troubleshooting and Common Problems
| Problem | Possible Cause | Solution |
| Ants ignore baits completely | Wrong bait type for species, expired baits, strong food competition | Try different bait brand, remove all accessible food, wait 24 hours for ants to approach. |
| Ants disappeared, then returned after 5 days | Insufficient treatment duration, sealed only obvious entry points, missed secondary nest | Continue baiting for full 7-14 day cycle, inspect for additional entry points, apply baits longer than initial disappearance. |
| Ants congregate at baits but disappear within 24 hours | Baits consumed too quickly or moved by ants to nest, excessive ant traffic | Replace consumed baits immediately, apply larger quantities (pea-sized dots instead of specks), expect continued swarming as a positive sign. |
| Baits become hard or crystallized | Moisture exposure, age, improper storage | Replace with fresh baits stored in cool, dry location. Remove hardened baits as they won’t attract ants. |
| New ant trails appear at different locations after treatment | Colony relocated to secondary nest site, new colony entered from outside, incomplete sealing | Apply baits to new trails immediately, inspect perimeter for new entry points and seal them, continue treatment for full cycle. |
| After baiting 2 weeks, 50% of ants remain | Partial colony immunity, multiple sub-colonies, insufficient bait quantity | Increase bait application by 50%, switch to different bait brand, treat for full 4 weeks instead of stopping early. |
| Baits work initially but resistance builds | Normal for large colonies, some colonies develop genetic resistance | Switch bait active ingredients (from fipronil to hydramethylnon, for example), contact professional if problem persists past 3 weeks. |
| Ants around bait stations but not consuming | Bait contaminated or stale, wrong consistency (too hard or too soft), overcrowded station | Replace baits with fresh product, ensure gel consistency is smooth and spreadable, space baits further apart. |
Expert Tips
Tip 1: Use Multiple Bait Types Simultaneously
Deploy both gel and liquid baits in the same area. Different colony members show taste preferences; some prefer gel while others prefer liquid. This increases consumption speed and ensures the queen receives poison regardless of bait type preference.
Tip 2: Place Baits Along Walls, Not in Open Spaces
Ants navigate using pheromone trails along edges. Baits placed directly on these trails attract ants 3-5 times faster than baits in open spaces. Position bait dots touching baseboard lines or along counter edges.
Tip 3: Use Boric Acid for Stubborn Species
Pharaoh ants particularly avoid commercial gel baits due to strong odors. Homemade boric acid bait (boric acid mixed with powdered sugar and water) often works better. Apply sparingly; boric acid is more toxic than borax.
Tip 4: Monitor Entry Points Weekly After Sealing
Even careful sealing sometimes leaves gaps ants discover. Check sealed entry points weekly for new ant activity. If ants return, the seal failed. Reseal with additional caulk or wider coverage.
Tip 5: Use Diatomaceous Earth as a Perimeter Barrier
After eliminating an infestation, apply food-grade diatomaceous earth around exterior baseboards (outside only). This creates a preventative barrier stopping new invasions for 30-60 days.
Tip 6: Track Ant Populations With Daily Photos
Take photos of affected areas daily. Objective documentation reveals treatment progress better than memory. If you have 100 ants on day 1 and 10 on day 7, that’s 90% success; subjective memory often underestimates progress.
Tip 7: Address Water Sources First
Before baiting, fix all water leaks. Ants need water as much as food. Eliminate moisture sources in bathrooms, under sinks, and around pet water bowls. This forces ants to seek baits for survival.
Tip 8: Apply Baits During Peak Activity Hours
Ants forage most actively in early morning (6-8am) and evening (5-7pm). Apply fresh baits during these windows to maximize immediate consumption and colony delivery.
When to Call a Professional
Call a professional if:
Infestation persists after two full weeks (14 days) of correct bait application and entry point sealing. You’ve tried three different bait brands and ants consistently ignore all of them. Ants are carpenter ants (they damage wood structures, requiring specialized treatment). Infestation affects your entire home or multiple rooms beyond your ability to manage. You have immunocompromised family members for whom ant-borne pathogens pose health risks. You suspect multiple nesting sites in walls or inaccessible areas. Rental or commercial property requires pest control documentation for liability reasons.
What to expect from professionals:
Licensed exterminators conduct a thorough inspection, identify ant species precisely, locate primary and secondary nests, apply professional-grade treatments (higher concentrations than retail products), provide follow-up visits (typically 2-4 visits over 4-6 weeks), offer service guarantees, and give prevention recommendations. Professional treatment typically costs $200-$500 for initial service plus follow-ups; pest control contracts range $300-$800 annually for maintenance.
When DIY is sufficient:
Infestation is limited to one or two rooms. You see ants only in kitchens or bathrooms, not spreading through the home. Ants are not carpenter ants. You’re willing to commit to 4 weeks of treatment. Entry points are accessible and can be sealed easily. You have no health vulnerabilities or legal requirements.
What to Do Next
Immediate Actions (After Ants Disappear):
Continue baiting for an additional 7 days after you see zero ants. This eliminates any surviving stragglers and prevents colony resurrection. Maintain your cleaning routine (daily sweeping, wiping counters) for two weeks. Fix any remaining water leaks. Verify all caulked entry points remain sealed.
Short-Term Maintenance (Weeks 3-8):
Leave bait stations in place for a full month even after ants disappear. This catches any new invasions immediately. Maintain sealed entry points. Store all food in airtight containers. Take out garbage daily. Wipe up spills immediately after meals.
Long-Term Prevention (Months 2+):
Deep clean your home monthly, paying attention to under appliances and inside cabinets. Seal any new gaps or cracks as they appear. Fix water leaks immediately upon discovery. Keep pet food sealed and remove uneaten portions within 2 hours. Consider annual diatomaceous earth perimeter treatment in warm months. If ants return, restart treatment immediately (don’t wait weeks hoping they’ll leave).
Seasonal Preparation:
Ants increase activity in spring and summer. Before warm weather, inspect your home’s exterior for potential entry points. Seal gaps around exterior faucets, pipes, and foundation cracks. Trim vegetation away from your home’s perimeter (ants travel on plants). These preventative actions eliminate seasonal invasions before they start.
FAQs
Q: Are tiny ants in my home dangerous?
A: Most tiny ants (sugar ants, pharaoh ants, ghost ants) cause no direct harm but can contaminate food, trigger allergies, and create property damage in severe infestations. Pharaoh ants specifically enter medical equipment and wounds in hospitals, though this risk is minimal in homes. Eliminate them primarily for cleanliness and prevention of larger infestations.
Q: Can I use essential oils to kill ants permanently?
A: Essential oils repel ants but don’t eliminate colonies. Cinnamon, peppermint, and clove oils deter foraging ants temporarily, but they never reach the queen, so the colony survives and returns. Use essential oils for prevention after successful elimination, not as primary treatment.
Q: How long does it take to see results from ant baits?
A: You should notice a reduction in visible ants within 3-5 days as baited ants return poisoned to the nest. Complete elimination typically requires 7-14 days for small colonies and 14-21 days for larger colonies. Large colonies may take up to 4 weeks.
Q: Why are ants returning to my kitchen after I sealed entry points?
A: You likely missed secondary entry points. Ants use multiple routes into homes. Check around pipes under sinks, gaps around utility lines, cracks in foundation visible from the basement, gaps between floorboards, and openings around windows. Many homes have 8-12 entry points; sealing only 2-3 leaves the infestation mostly untouched.
Q: Should I remove ant baits after baiting for 7 days?
A: No. Leave baits for 14 days minimum, even if ants are gone by day 7. Removing baits early allows surviving ants to rebuild. Many colonies require the full 14 days to completely eliminate the queen and all reproductive females.
Q: Can vinegar kill ants?
A: Vinegar kills ants on contact and destroys pheromone trails, making it useful for cleaning, but it doesn’t poison the colony. Use vinegar for trail removal and preventative cleaning, not as the primary treatment method.
Q: What’s the difference between tiny ants and carpenter ants?
A: Tiny ants (pharaoh, sugar, ghost ants) are 1-3mm long, live in large colonies (100,000+ ants), and cause no structural damage. Carpenter ants are 6-13mm long, live in smaller colonies (10,000 ants), and tunnel through wood, causing structural damage. Carpenter ants require different treatment; contact a professional for carpenter ant infestations.
Q: If I see one ant, does that mean there’s a colony in my house?
A: Likely yes. Solitary foraging ants are uncommon; when ants find food, they communicate with colony members. One ant usually means 100-1,000 more are using the same trail. Treat immediately rather than monitoring and hoping they leave.
Q: Can I use the same bait station location for prevention after treatment?
A: Yes. Leaving bait stations in the same location for maintenance (once monthly) catches invasions early before they establish. Place baits only in areas where ants previously appeared and in high-risk zones like kitchens and pantries.
Q: What should I do if I see ants near or in my walls?
A: This may indicate a nest inside walls (carpenter ants or well-established pharaoh colonies). Place baits along baseboards in that room and contact a professional for wall cavity inspection. DIY treatment alone often fails for wall nests because ants are inaccessible.
Final Thoughts
Eliminating tiny ants requires persistence, correct identification, and simultaneous action on multiple fronts: baiting for colony elimination, sealing for prevention, and cleaning for removal of attractants. Most infestations resolve within 7-14 days using commercial baits, but complete success demands commitment to the full treatment cycle (14-21 days minimum).
The combination of ant baits, entry point sealing, and consistent food source removal creates conditions where tiny ant colonies cannot survive. Monitor your progress objectively through daily observations and photos, adjust your approach if baits are ignored after 5 days, and resist the urge to give up early even when initial results appear successful.
After treatment ends, maintain prevention habits for at least one month and remain vigilant about sealing new entry points and addressing water leaks. Following these methods, you’ll achieve a completely ant-free home within 21-30 days and prevent future invasions with minimal ongoing effort. Start today, stay consistent, and you’ll reclaim your home from tiny ant invasions.
