
Deodorant stains are frustrating because they seem simple to prevent but are surprisingly difficult to remove once they set in. Whether you’re dealing with white streaks on dark fabric, stubborn yellow marks on whites, or crusty buildup in the armpit area, the treatment depends on the stain type, fabric, and how long it’s been there.
This guide covers everything you need to remove deodorant stains successfully, from fresh marks to years-old yellowing. You’ll learn why different stain types require different approaches, which methods work on delicate fabrics, and how to prevent stains from forming in the first place. By the end, you’ll have a clear action plan that matches your specific problem.
Featured Snippet
To remove deodorant stains, treat white marks by brushing off dried residue and using a stain remover or rubbing alcohol, then wash in hot water. For yellow stains on whites, use an oxygen-based bleach or a paste of baking soda and water. Treat the stain before washing and allow it to sit for 15–30 minutes for best results.
Before You Begin
Difficulty Level: Beginner to Intermediate
Time Required: 15 minutes (fresh stains); 30–60 minutes (set-in stains)
Cost Estimate: $0–10 (using household items or commercial stain removers)
DIY vs. Professional: This is entirely a DIY job. Professional dry cleaning can help with stubborn stains on delicate fabrics, but home treatment works for most situations.
What You Should Know: Deodorant stains come in two main types: white/chalky residue and yellow discoloration, and each requires a different approach. White marks come from product buildup and are surface-level, while yellow stains result from chemical reactions between deodorant ingredients and sweat and can be deep-set. Understanding which type you have determines your treatment strategy.
Choosing the Right Approach
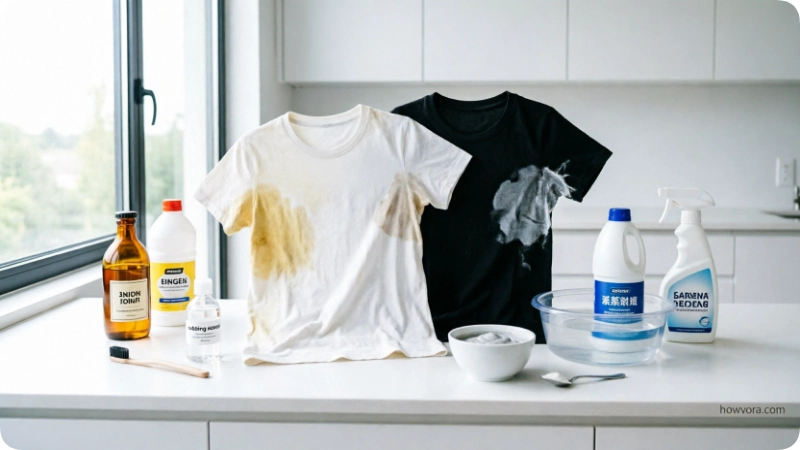
Multiple methods work for deodorant stains, and the best choice depends on stain type, fabric, and severity.
| Method | Best For | Pros | Cons | Cost | Time to Results |
| Rubbing Alcohol + Brush | Fresh white marks on any fabric | Fast, gentle, uses common household item | Only effective on fresh residue, not yellowing | $0–3 | 5–10 minutes |
| Baking Soda Paste | Yellow stains on whites, mild stains on colors | Natural, inexpensive, safe on most fabrics, multipurpose | Slower, may require multiple applications, works best on lighter fabrics | $0–2 | 30–60 minutes |
| Commercial Stain Remover (Fels-Naptha, Zout, etc.) | All stain types, especially stubborn marks | Fast-acting, designed for deodorant stains, reliable | Cost ($3–8 per bottle), chemical-based, may irritate sensitive skin | $3–8 | 10–30 minutes |
| Oxygen Bleach (OxiClean) | Yellow stains on whites, colorfast fabrics | Stronger than baking soda, works on discoloration not just residue, safe on colors | Slower than stain removers, requires soaking, not effective on white marks alone | $5–12 | 1–8 hours |
| Vinegar + Baking Soda | Yellow stains, deodorant odor, budget option | Dual action (acid + abrasive), deodorizes, very cheap | Slower than commercial products, strong vinegar smell, may require soaking | $0–3 | 2–4 hours |
| Enzyme-Based Cleaner | Stubborn, set-in stains of any type | Breaks down organic compounds in deodorant, works on old stains | Requires overnight soaking, slower than other methods, need to find enzyme cleaners | $5–10 | 8–12 hours |
| Professional Dry Cleaning | Expensive fabrics, delicate materials, very stubborn stains | Professionals have industrial-strength treatments, safe on silk and wool | Expensive ($5–15 per item), slow, unnecessary for most stains | $5–15+ | 2–5 days |
Recommended Approach: For fresh white marks, start with rubbing alcohol and a soft brush. It’sfast and gentle. For yellow stains or set-in marks, use a baking soda paste or commercial stain remover. For deep-set, years-old yellowing on whites, use oxygen bleach. Most home methods work well; the key is treating the stain before washing.
At a Glance
| Aspect | Details |
| Difficulty | Easy to moderate |
| Time | 5–60 minutes active; 1–8 hours with soaking |
| Cost | $0–15 total |
| Success Rate | 85–95% on fresh stains; 60–80% on set-in stains |
Things You’ll Need
| Item | Purpose | Where You Likely Have It |
| Soft-bristled brush or old toothbrush | Removes dried residue without damaging fabric | Bathroom, kitchen |
| Rubbing alcohol (70% isopropyl) | Dissolves fresh deodorant marks | Medicine cabinet or drugstore |
| Baking soda | Create a paste for stain treatment | Kitchen pantry |
| White vinegar | Acidic component to break down stains | Kitchen |
| Water (warm or hot) | Dilutes treatments and activates them | Tap water |
| Commercial stain remover (optional) | Speeds removal of stubborn stains | Laundry aisle |
| Oxygen-based bleach (optional) | Tackles deep yellowing | Laundry aisle |
| Enzyme cleaner (optional) | Breaks down organic stain compounds | Laundry or cleaning aisle |
| Clean cloth or sponge | Applies treatment to fabric | Any household cloth |
| Plastic spray bottle | Distributes liquid treatment evenly | Kitchen or bathroom |
Safety Precautions
Skin irritation from treatment products: Rubbing alcohol, vinegar, and some commercial stain removers can irritate sensitive skin. Wear gloves when handling, or wash hands immediately after application. Avoid touching your face during treatment.
Bleach safety: Never use chlorine bleach on deodorant stains; it can yellow whites and cause permanent damage to colors. Use only oxygen-based bleach, which is gentler.
Fabric damage from heat: Do not use hot water on delicate fabrics like silk, wool, or Lycra blends. Use lukewarm water instead. Always check the garment’s care label before treating.
Ammonia and bleach interaction: If a commercial stain remover contains ammonia, never mix it with bleach-based cleaners. Toxic chloramine gas can form.
Colorfast testing: Before applying any treatment to colored fabric, test it on an inconspicuous area (inside seam, back hem) to ensure it doesn’t cause discoloration.
Step-by-Step Guide
Step 1: Identify the Stain Type and Fabric
What to do:
- Examine the stain closely. Is it white/chalky residue, yellow discoloration, or both?
- Check the garment’s care label to determine fabric type and safe water temperature.
- If the fabric is silk, wool, or delicate, note that you’ll need gentler treatments.
- Check if the stain is fresh (today or recently) or set-in (days, weeks, or months old).
Why it matters: White marks require different treatment than yellow stains, and some fabrics can’t tolerate hot water or harsh chemicals. Knowing what you’re dealing with prevents damage.
What success looks like: You’ve correctly identified whether your stain is white, yellow, or both, and you know your fabric type before starting treatment.
Common beginner mistake: Assuming all deodorant stains are the same. White marks are surface residue; yellow stains are chemical discoloration. Using the same method for both rarely works.
Step 2: Remove Dried Residue from White Marks
What to do:
- If the stain is white and crusty, use a soft-bristled brush or an old toothbrush to gently brush away dried deodorant.
- Brush in one direction to avoid pushing residue deeper into fibers.
- Hold the fabric taut with your other hand so you don’t accidentally scrub a hole.
- If significant residue flakes off, vacuum or shake out loosened particles over a sink.
- Don’t soak or rinse yet—dry brushing is your first step.
Why it matters: Removing the bulk of dried deodorant prevents it from spreading when you apply liquid treatments. This is especially important on dark fabrics, where white residue shows up.
What success looks like: Most visible white residue is gone, and the fabric surface is clear of dried deodorant chunks. A faint mark may remain, but the crusty layer is removed.
Common beginner mistake: Skipping the brushing step and going straight to wet treatments. Wet deodorant spreads and can worsen the stain temporarily before treatments dissolve it.
Step 3: Treat Fresh White Marks with Rubbing Alcohol
What to do (for fresh white marks only):
- Pour rubbing alcohol onto a clean cloth or cotton pad.
- Dab the stain gently, allowing the alcohol to penetrate the fabric.
- Rub the stain in circular motions, working from the outside edge toward the center.
- Continue until the white mark visibly lightens or disappears.
- Rinse with cool water and allow to air dry.
- Assess the result before washing. If still visible, proceed to Step 4.
Why it matters: Rubbing alcohol dissolves fresh deodorant residue quickly because alcohol breaks down the oils and powders in the product. It works best on marks less than 24 hours old.
What success looks like: The white mark is dramatically lighter or completely gone after rubbing with alcohol.
Common beginner mistake: Using too much alcohol and oversaturating the fabric, which can cause discoloration on some materials. Use just enough to dampen the cloth, not to soak the garment.
Step 4: Treat Yellow Stains with Baking Soda Paste
What to do (for yellow stains or stains alcohol didn’t remove):
- Mix baking soda with water in a small bowl to create a paste; the consistency should resemble wet sand, thick enough to stay on fabric.
- Apply the paste directly to the yellow stain using a spoon or an old toothbrush.
- Gently rub the paste into the fabric for 1–2 minutes using circular motions.
- Let the paste sit on the stain for 15–30 minutes. (Longer is better for set-in stains.)
- Rinse thoroughly with cool water, rubbing gently to remove all paste residue.
- Assess. If the yellow is still visible, proceed to Step 5 or use a commercial stain remover.
Why it matters: Baking soda is mildly abrasive and alkaline, which helps break down the chemical bonds in yellow deodorant stains. It’s safe on most fabrics and inexpensive.
What success looks like: The yellow discoloration is noticeably lighter after rinsing. Some stubborn stains may require multiple applications or a stronger method.
Common beginner mistake: Not letting the paste sit long enough. The longer baking soda contacts the stain, the more effective it is. Don’t rinse immediately.
Step 5: Use Oxygen Bleach for Stubborn Yellow Stains
What to do (for persistent yellowing on whites or colorfast fabrics):
- Check that the fabric is white or colorfast by testing on a hidden area.
- Dissolve oxygen bleach (like OxiClean) in water according to package directions.
- Submerge the stained area or soak the entire garment for 1–8 hours.
- For a paste treatment, mix oxygen bleach powder with water to form a paste and apply directly to the stain.
- Allow the paste to sit for 30 minutes to several hours.
- Rinse thoroughly with cool water.
- Wash the garment immediately in warm water with regular detergent.
Why it matters: Oxygen bleach penetrates deeper than baking soda and breaks down the oxidation that creates yellow discoloration. It’s much safer than chlorine bleach and works on some colors.
What success looks like: The yellow stain is significantly faded or removed after soaking and rinsing.
Common beginner mistake: Using on colored fabrics without testing. While oxygen bleach is safer than chlorine bleach, some colors may still fade. Always spot-test first.
Step 6: Wash the Garment
What to do:
- After stain treatment (with any method), place the garment in the washing machine.
- Add regular laundry detergent.
- Use the warmest water safe for the fabric (check care label; hot for whites, warm for colors, cold for delicates).
- Wash on a normal or gentle cycle depending on the fabric.
- Before drying, inspect the stain. If it’s gone, air dry or tumble dry on low. If it remains, repeat the stain treatment before drying (heat sets stains permanently).
Why it matters: Washing removes all treatment residue and completes the stain removal process. Never machine-dry before confirming the stain is gone—dryer heat is very difficult to reverse.
What success looks like: The garment smells fresh and clean, with no visible stains. The treatment has been fully rinsed away.
Common beginner mistake: Machine drying before checking if the stain is gone. If a stain remains, heat can set it permanently, making future removal nearly impossible.
How to Know You Did It Correctly
Immediate signs (during treatment):
- The white residue visibly lightens or disappears after brushing and alcohol treatment.
- The yellow discoloration fades during baking soda paste application.
- The fabric is free of visible treatment residue (paste, alcohol, bleach solution) after rinsing.
Short-term verification (after washing):
- No visible stain on the dry garment under normal lighting.
- No faint yellow shadow where the stain was (unless the stain was very old and deeply set).
- The garment smells clean and has no chemical odor from treatments.
Success confirmation:
- The stain is completely gone, or reduced to a barely noticeable level that doesn’t bother you.
- The fabric is unharmed, with no discoloration, holes, or damage from treatment.
- The garment can be worn confidently without the stain showing.
If the stain persists:
- It may be a set-in stain from months or years of accumulation, requiring stronger methods like an enzyme cleaner or professional dry cleaning.
- The treatment method may not match the stain type. Re-evaluate whether it’s white residue (use alcohol) or yellowing (use oxygen bleach).
- The stain may be permanent if the fabric’s fibers have absorbed the discoloration. (This is rare but possible on very old stains.)
Expected Timeline and Results
Immediately (Fresh White Marks, 5–15 minutes):
White residue from today’s deodorant can often be completely removed with alcohol and a brush within minutes. Results are visible right away.
Short-term (Baking Soda Paste, 30–60 minutes):
Yellow stains typically show improvement within 30 minutes of baking soda treatment. Lighter stains may disappear; stubborn ones fade noticeably.
Medium-term (Oxygen Bleach, 1–8 hours):
Deep yellowing requires several hours of soaking. Begin to see results after 2–3 hours; maximum results after 8 hours or overnight.
Long-term (Set-in Stains, 24+ hours old):
Stains that have been present for weeks or months may require multiple treatments or stronger methods. Each attempt removes some discoloration, but complete removal may take 2–3 rounds.
When to repeat:
If the stain is still visible after the first treatment, wait 24 hours and retreat. Stains sometimes reappear slightly after drying due to residual oils. A second round usually completes removal.
When to switch methods:
If alcohol didn’t work, the stain isn’t fresh white residue, switch to baking soda for yellowing. If baking soda fades it only slightly, use oxygen bleach. Unless oxygen bleach shows no improvement, consider an enzyme cleaner or professional dry cleaning.
Alternative Methods
Commercial Stain Remover (Fels-Naptha, Zout, Shout, etc.)
Advantages: Fast-acting, specifically formulated for deodorant stains, reliable results, works on both white and yellow marks, available everywhere.
Disadvantages: Chemical-based, cost ($3–8 per bottle), can irritate sensitive skin, may cause fabric discoloration on some colors if not rinsed well.
Best use case: When you want the fastest results or have a stain that resists home remedies. Apply directly to the stain, let sit for 5–10 minutes, then wash. Highly effective.
Vinegar Paste
Advantages: Acidic action breaks down yellowing, is inexpensive, is dual-purpose with baking soda, and deodorizes fabric.
Disadvantages: Strong vinegar smell that persists until after washing, slower than commercial products, less effective on fresh white marks.
Best use case: Combine equal parts white vinegar and baking soda to form a paste for stubborn yellow stains. The chemical reaction enhances stain-fighting power.
Enzyme Cleaner (like Zout with Enzymes or Dawn with Enzymes)
Advantages: Breaks down organic compounds in deodorant and sweat, works on old, set-in stains, effective on protein-based stains.
Disadvantages: Slower (requires overnight soaking), requires finding enzyme-specific cleaners, most effective on whites rather than colors.
Best use case: Use for stains that have been present for weeks or months. Soak the garment overnight in enzyme cleaner, then wash normally.
Hydrogen Peroxide (3% solution)
Advantages: Bleaching action on whites and light colors, safe alternative to chlorine bleach, inexpensive.
Disadvantages: Slower than oxygen bleach, only effective on light fabrics, won’t work on dark colors (can bleach them), less reliable than other methods.
Best use case: Apply to fresh yellow stains on whites. Let it sit for 15–30 minutes, then rinse and wash. Test on a hidden area first.
Aspirin Paste
Advantages: Inexpensive, readily available, works on protein stains (sweat component).
Disadvantages: Slower than other methods, not well-tested, can discolor some fabrics if left too long.
Best use case: As a last resort. Dissolve 2–3 aspirin tablets in warm water to form a paste, apply to stain, let sit 30 minutes, rinse and wash.
Common Mistakes to Avoid
Mistake 1: Treating white marks with water before removing dried residue
What it is: Immediately washing or soaking without brushing off crusty deodorant first.
Why it happens: It seems faster to just wet-treat the stain.
Consequence: The dried product rehydrates and spreads, making the stain larger and harder to remove.
How to prevent it: Always brush away dried residue first, even if it takes an extra minute.
Mistake 2: Using chlorine bleach on deodorant stains
What it is: Reaching for regular Clorox or bleach-based cleaners.
Why it happens: Bleach is associated with stain removal.
Consequence: Chlorine bleach can yellow whites further and bleach out colors permanently. Deodorant stains don’t respond well to chlorine bleach anyway.
How to prevent it: Use only oxygen-based bleach (OxiClean, hydrogen peroxide) for deodorant stains. Keep chlorine bleach for different purposes.
Mistake 3: Using hot water on delicate fabrics
What it is: Treating silk, wool, or lycra with hot water-based treatments.
Why it happens: Hot water seems more effective at removing stains.
Consequence: Heat can shrink, yellow, or damage delicate fibers.
How to prevent it: Check the care label first. Use lukewarm or cool water on anything delicate. Baking soda paste works on delicates without heat.
Mistake 4: Drying before confirming stain removal
What it is: Putting the garment in the dryer without checking that the stain is completely gone.
Why it happens: People assume once it’s washed, the stain is gone.
Consequence: Heat permanently sets any remaining stain, making it nearly impossible to remove later.
How to prevent it: Always inspect the damp garment after washing and before drying. Only air dry or tumble dry once you’re certain the stain is gone.
Mistake 5: Mixing alcohol-based and bleach-based treatments
What it is: Applying rubbing alcohol, then immediately using bleach, or vice versa.
Why it happens: Trying to combine methods for faster results.
Consequence: Alcohol can react with bleach and reduce its effectiveness, or leave residue that interacts poorly with other products.
How to prevent it: Rinse thoroughly between treatments. Don’t layer methods unless specifically designed to work together (like baking soda + vinegar).
Mistake 6: Treating only the visible stain without checking the back of the fabric
What it is: Applying treatment only to the front side of the garment.
Why it happens: The stain is visible on the front, so people assume that’s where all the discoloration is.
Consequence: Treatment only works halfway because the stain has soaked through to the back. The garment dries with staining still visible on the other side.
How to prevent it: Always flip the garment and check the back. Treat both sides if the stain has penetrated, or treat the back (which often has more intense discoloration).
Why Many Attempts Fail
The method doesn’t match the stain type: Using alcohol on yellowing won’t work; using baking soda on fresh white marks won’t work. People apply ineffective treatments and give up, assuming the stain is permanent.
Treatments aren’t given enough time: Rubbing alcohol needs only minutes, but baking soda and oxygen bleach need 15–30 minutes or longer. Impatient treatment leads to disappointing results.
Stains are dried into permanence before treatment: If the garment was washed and dried with the stain present, heat has set it. Old, heat-set stains are much harder to remove. This is why timing is critical.
Multiple treatments overlap poorly: Mixing products that interact (alcohol + bleach, ammonia + bleach) reduces effectiveness or causes damage. People layer treatments without rinsing between them.
The stain is older and deeper than it appears: Yellowing that looks like one wash cycle might actually be months of buildup. Old stains need stronger treatments (enzyme cleaner, professional dry cleaning) and multiple rounds.
Fabric damage prevents further treatment: If a harsh method damages the fibers (heat, aggressive scrubbing, harsh chemicals), the area is weakened, and further treatment is risky.
Troubleshooting and Common Problems
| Problem | Possible Cause | Solution |
| White stain spreads after alcohol treatment | Oversaturation or rubbing too vigorously | Use less alcohol on the cloth, dab gently instead of rubbing, let cloth dry before assessing |
| Yellow stain unchanged after baking soda | Stain is too old or too deep, baking soda isn’t strong enough | Move to oxygen bleach or enzyme cleaner for overnight soaking |
| Stain reappears after washing and drying | Treatment residue remained in fabric and resurfaced as it dried | Rinse more thoroughly before washing, inspect the damp garment before drying |
| Fabric is discolored or lightened after treatment | Bleach-based treatment applied to colors or delicate fabric | Treat on hidden area first, use oxygen bleach instead of chlorine, switch to gentler methods |
| Stain smells like vinegar after treatment | Vinegar paste treatment wasn’t fully rinsed | Rinse again, wash with extra detergent, air dry to let vinegar smell dissipate |
| Multiple treatments have failed | Stain is heat-set from previous drying, or too old to remove | Accept that the stain may be permanent, or try professional dry cleaning as last resort |
| Baking soda paste leaves residue and makes stain worse | Paste wasn’t fully removed during rinsing | Use more water and a cloth to wipe away all paste, rinse multiple times |
| Stain is faint but still visible | Partial success is common with stubborn stains | Repeat treatment weekly, light usually fades to acceptance after 2–3 rounds |
Expert Tips
Tip 1: Treat the stain the day it appears. Fresh deodorant comes off far more easily than old buildup. Don’t wait a week; treat immediately after wearing the garment.
Tip 2: Always treat the back of the garment, even if you can’t see the stain there. Deodorant soaks through fabric, and the back often shows discoloration. Treating only the front leaves shows visible staining.
Tip 3: Use cool or room-temperature water for the first rinse. Hot water can set stains, especially yellowing. Start cold, then use warm water for washing.
Tip 4: Brush the stain from the outer edges inward, not outward. Brushing outward spreads the residue; inward concentrates it for removal.
Tip 5: Test any new treatment on the inside seam or hem first. Some fabrics are colorfast and safe to treat; others bleach or stain from chemicals. Always spot-test before committing.
Tip 6: Let treatments sit longer than you think necessary. Baking soda and oxygen bleach are slow workers. 30 minutes is a minimum; overnight soaking often yields 20–30% better results than quick treatment.
Tip 7: Use an enzyme cleaner weekly on frequently stained areas as a preventive measure. If a garment gets deodorant stains regularly, soak it weekly in diluted enzyme cleaner to prevent buildup from setting.
Tip 8: Avoid antiperspirant deodorants if staining is a recurring problem. Antiperspirant ingredients (aluminum salts) are more likely to stain yellow than plain deodorant. Switching to aluminum-free deodorant reduces future staining.
When to Call a Professional
DIY is enough if:
- The stain is less than 1 week old and still visible on the surface.
- You’ve tried one home method (alcohol or baking soda) and seen improvement.
- The fabric is cotton, polyester, or other common washable materials.
- You have no concern about the garment’s cost if the treatment doesn’t work completely.
Consider professional dry cleaning if:
- The stain is on an expensive garment (silk dress, wool sweater, linen suit).
- Multiple DIY attempts have failed after 2–3 weeks of effort.
- The fabric is delicate or has a special finish that you’re hesitant to treat.
- The garment is heirloom or sentimental, and you don’t want to risk damage.
- The stain has been present for months or years and is deeply set.
What professionals can do:
- Use industrial-strength solvents and treatments not available to consumers.
- Safely treat fabrics you might damage at home (silk, wool, linen blends).
- Handle very old stains with specialized enzyme and bleach treatments.
Cost: Expect $5–15 per garment for stain removal, or $10–25 for full cleaning with stain treatment.
What to Do Next
Immediate prevention (starting today):
- Allow deodorant to dry completely on your skin before putting on clothes (10–15 seconds).
- Wear an undershirt under dress shirts, blouses, or colored tops to protect outer layers.
- Reapply antiperspirant the night before, not the morning of, to reduce the amount needed in the morning.
Short-term prevention (this week):
- Switch to a clear or gel deodorant if you’re using a white cream formula.
- Buy a stain-prevention product like Sweat Guard or Dress Shield to place under the armpits.
- Identify which garments stain most easily and reserve them for occasions when deodorant exposure is minimal.
Long-term maintenance (ongoing):
- Wash heavily stained garments promptly; don’t let them sit in the hamper for days.
- Pretreat underarm areas weekly with enzyme cleaner as preventive maintenance.
- Consider switching to antiperspirant-free deodorant if regular products cause persistent staining.
- Inspect garments after wearing before putting them away, and treat any stains immediately.
- Keep a bottle of rubbing alcohol or commercial stain remover in your laundry area for quick access.
FAQs
Q1: Why do some deodorants stain more than others?
White cream or paste deodorants stain more than clear gels because they’re harder to apply smoothly and leave residue. Antiperspirant deodorants (which contain aluminum salts) are more likely to cause yellow staining than plain deodorant. Switch to clear gel or aluminum-free deodorant if staining is a persistent problem.
Q2: Can deodorant stains ever be permanent?
Yes, if stains are heat-set (dried in the dryer) or are very old (months or years), they can become difficult or impossible to remove. However, most fresh stains within a few days are removable with proper treatment. Professional dry cleaning is the last resort.
Q3: Is the yellow stain from the deodorant itself or from my sweat?
Both. Deodorant ingredients (especially aluminum in antiperspirants) chemically react with sweat components to create yellow discoloration. The stain isn’t purely one or the other but a combination. This is why antiperspirant deodorants stain more.
Q4: Why does the stain sometimes reappear after washing?
Residual deodorant oils can migrate to the fabric surface as it dries, creating a faint stain again. Ensure all treatment products are thoroughly rinsed before washing, andair-dryy the garment to inspect it before using the dryer.
Q5: Can I remove deodorant stains from dry-clean-only fabrics at home?
Yes, with caution. Use gentle methods like cool-water baking soda paste or oxygen bleach, test on a hidden area first, and avoid heat and harsh chemicals. For expensive garments, professional dry cleaning is safer.
Q6: What’s the difference between white deodorant stains and yellow deodorant stains in terms of removal?
White stains are surface residue and come off with brushing and alcohol. Yellow stains are oxidation and chemical discoloration requiring alkaline or bleaching treatments. Treating the wrong type with the wrong method wastes time.
Q7: How can I prevent future deodorant stains?
Use clear gel deodorant instead of white paste, allow deodorant to dry before dressing, wear an undershirt, or use dress shields. Switch to antiperspirant-free deodorant if you’re prone to yellow staining. Treat and wash garments promptly.
Q8: Does vinegar actually help with deodorant stains, or is it just for smell?
Vinegar’s acidity does help break down yellow discoloration and works best combined with baking soda (a paste). Alone, it’s slower than other methods, but when mixed with baking soda, it’s effective and inexpensive.
Q9: Are deodorant stains a health concern?
No. The stains themselves aren’t harmful. They’re purely cosmetic. However, they can indicate fabric damage or chemical buildup, which is why removal is preferred for garment longevity.
Q10: Why does rubbing alcohol work so well on fresh deodorant marks?
Alcohol dissolves the oils and wax-like compounds in deodorant formulas. It works quickly on fresh, undried product because those compounds haven’t yet bonded to the fabric fibers. On older stains, the deodorant has already set, making alcohol less effective.
Final Thoughts
Deodorant stains are annoying, but they’re almost always removable if you act quickly and use the right method for the stain type. Fresh white marks disappear in minutes with rubbing alcohol. Yellowing takes longer but responds well to baking soda or oxygen bleach. Even months-old stains can fade with persistence.
The real victory is prevention. Allow deodorant to dry, wear undershirts, use clear formulas, and treat stains the day they appear. This combination keeps your clothes looking fresh and eliminates frustration.
You don’t have to throw away garments because of deodorant stains. With the right approach, your favorite shirts will look clean and new again.
