
Finding earwigs inside your home is unsettling, especially when you discover them crawling near your bed or in the bathroom. These pincer-equipped insects are mostly harmless; they rarely bite and don’t cause structural damage, but their presence is disturbing and indicates a humidity or entry problem that needs fixing.
The good news is that earwig infestations are easier to resolve than most household pest problems. You don’t need extensive treatment; instead, you need to understand why they’re entering, seal entry points, eliminate their hiding places, and use simple traps or targeted sprays to remove existing ones.
This guide shows you exactly how to eliminate earwigs from your house, prevent them from returning, and identify whether you need professional help or can handle it yourself.
Featured Snippet
The fastest way to get rid of earwigs in your house is to reduce moisture and humidity (their primary attractant) while using sticky traps to catch stragglers. Simultaneously, seal entry points and remove hiding places. Move firewood, lumber, flower pots, and stacked materials several feet away from your home’s foundation whenever possible. These outdoor hiding places often serve as staging areas where earwigs gather before entering homes, like newspapers and cardboard. For persistent infestations, apply insecticide spray in cracks and crevices. Most homeowners see results within 1-2 weeks using these combined methods.
Before You Begin
Difficulty Level: Beginner (straightforward trapping and sealing)
Time Required: 30 minutes to 2 hours for initial setup; ongoing monitoring takes 5-10 minutes daily
Estimated Cost: $10–$40 (DIY) vs. $150–$300 (professional pest control)
DIY vs. Professional: Most earwig infestations are handled easily by homeowners using traps and moisture control. Call a professional only if the infestation is massive (hundreds of earwigs), or if you suspect entry points are structural (foundation cracks, large gaps).
Prerequisites: Identify entry points (cracks, gaps around pipes, window seals), note moisture sources (leaky faucets, poor ventilation), locate areas where earwigs are seen (baseboards, kitchen, bathroom), and check that traps won’t interfere with children or pets.
Choosing the Right Approach
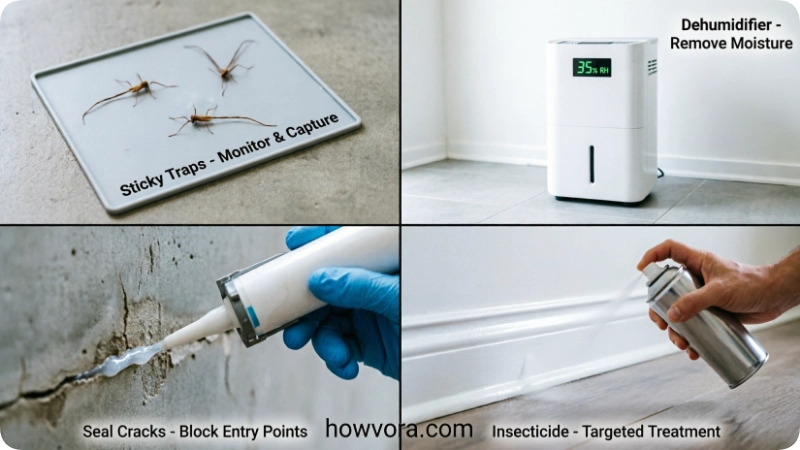
Earwig removal depends primarily on three factors: infestation severity, your home’s moisture level, and whether you prefer chemical or non-chemical solutions. Here’s how the main methods compare:
Method Comparison Table:
| Method | Pros | Cons | Best For |
| Sticky Traps | Non-toxic; safe around pets/kids; low cost; immediate visual results | Slow (results in 3-5 days); catches only visible earwigs, not all | Mild infestations; first-line defense; identifying entry points |
| Moisture Control | Addresses root cause; prevents reinfestation; improves home health; low cost | Takes 1-2 weeks to show full effect; requires sustained effort | All infestations; long-term prevention; eliminates the primary attractant |
| Insecticide Spray | Fast-acting; kills earwigs on contact; lasts 2-4 weeks | Contains chemicals; requires reapplication; doesn’t address moisture (core issue) | Heavy infestations, combined with moisture control, for the best results |
| Professional Service | Guaranteed results; targets all entry points; saves time | Expensive; less control over methods; overkill for mild cases | Severe infestations, structural entry points; when DIY fails twice |
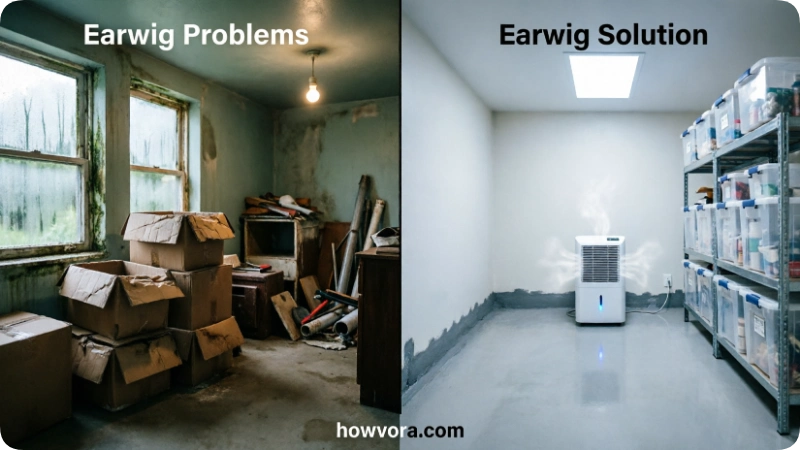
Why Moisture Control Is the Foundation: Earwigs enter homes seeking moisture and darkness. A house with high humidity and standing water will keep attracting earwigs even if you remove the current population. Reducing moisture to below 50% humidity eliminates the primary reason they stay. Traps and sprays are supporting tactics, not solutions by themselves.
At a Glance
Quick Reference Table:
| Aspect | Details |
| Difficulty | Beginner |
| Time to Start | 15–30 minutes |
| Time to Full Results | 7–14 days |
| Estimated Cost | $10–$40 |
| Safety Gear Needed | Gloves (optional); if using spray, wear mask and gloves |
| Reapplication Needed? | Yes, typically once after 1-2 weeks |
Things You’ll Need
Supplies and Their Purpose:
| Item | Purpose | Notes |
| Sticky Traps (earwig-specific or general insect) | Capture and monitor earwig activity | Place along baseboards and entry points |
| Dehumidifier | Reduce humidity below 50% | Essential for long-term control |
| Flashlight | Locate entry points and earwig hiding spots | Earwigs are nocturnal and hide in dark areas |
| Caulk and Caulking Gun | Seal cracks and gaps where earwigs enter | Use silicone caulk for durability |
| Weatherstripping | Seal gaps around doors and windows | Adhesive-backed foam or rubber strips |
| Insecticide Spray (optional) | Kill earwigs in hard-to-reach areas | Pyrethrins or bifenthrin-based sprays; only if traps fail |
| Paper Towels or Newspaper | Trap earwigs in rolled-up traps (alternative method) | Dampen slightly and check daily |
| Duct Tape | Seal gaps temporarily until the caulk dries | Quick fix while waiting for permanent sealing |
| Plastic Bags | Remove and discard cardboard and newspaper storage | Eliminates hiding places |
| Hygrometer | Monitor the humidity level | Ensures humidity stays below 50% |
Safety Precautions
Real Hazards and When Extra Caution Matters:
Earwig Pinches: Despite widespread myths, earwigs rarely pinch humans and cannot pinch hard enough to break skin. However, they may pinch if trapped or handled directly. Wear gloves when handling traps or when catching an earwig by hand.
Insecticide Use: If using insecticide sprays, apply in well-ventilated areas and wear a mask and gloves. Avoid spraying where children or pets sleep or eat. Allow sprayed areas to dry fully (2-4 hours) before people or pets return to the room. Store products out of reach of children and pets in original containers.
Dehumidifier Safety: Dehumidifiers generate heat and can be fire hazards if used improperly. Place on a stable, level surface away from water or high-traffic areas. Never cover the intake or exhaust vents. Clean the water collection tank regularly to prevent mold growth.
Caulking Fumes: Silicone caulk releases fumes during application and curing. Apply in well-ventilated areas and leave windows open for at least 24 hours while the caulk dries.
Moisture vs. Mold: While reducing humidity prevents earwigs, extremely low humidity (below 30%) can cause other problems. Maintain humidity between 30–50% as the ideal balance.
Step-by-Step Guide
Step 1: Identify Entry Points and Moisture Sources
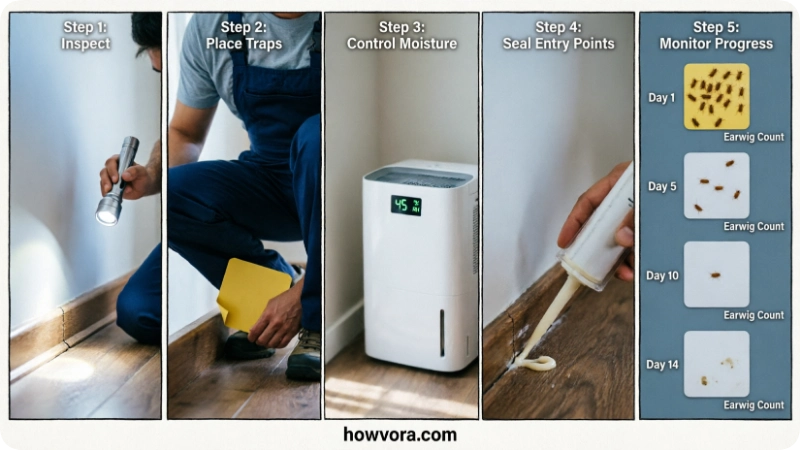
What to Do: Walk through your home with a flashlight, especially in the kitchen and bathroom. Look for cracks in baseboards, gaps around water pipes, gaps under doors, cracks near windows, and holes in the foundation or exterior walls. Simultaneously, identify moisture sources: leaky faucets, standing water, wet basement corners, or poor ventilation in bathrooms.
Why It Matters: You can trap and kill existing earwigs, but they’ll keep returning if entry points and moisture remain. Identifying these issues first ensures your solution addresses the root cause, not just symptoms.
What Success Looks Like: You’ve located at least 3 entry points and identified at least 2 moisture sources. You know where earwigs are hiding (baseboards, under sinks, in cardboard storage) and where they’re entering (cracks near ground level).
Common Beginner Mistakes:
- Focusing only on trapping without addressing moisture or entry points leads to reinfestation.
- Assuming the main entry is through windows when earwigs actually entered from foundation cracks or gaps under doors.
- Overlooking bathroom and kitchen moisture; these are prime earwig attractants.
- Not checking the basement or crawlspace, where earwigs hide before moving upstairs.
Step 2: Remove Hiding Places and Clutter
What to Do: Remove or bag up cardboard boxes, newspaper stacks, piles of cloth, and other moisture-absorbing materials where earwigs hide during the day. Store anything you keep in cardboard in sealed plastic containers instead. Declutter dark, damp areas like under sinks, in closets, and in basements.
Why It Matters: Earwigs spend daylight hours hiding in dark, damp spaces. Removing these habitats forces them into the open, where they can be trapped or seen. It also reduces the places they can establish populations.
What Success Looks Like: All cardboard storage is replaced with sealed plastic; under-sink areas are clear of clutter; no stacks of newspapers or magazines are visible; baseboards are accessible (not blocked by furniture).
Common Beginner Mistakes:
- Removing clutter but not storing it properly, allowing earwigs to simply relocate to a different cardboard box.
- Focusing on visible clutter while missing hidden storage in closets or the basement.
- Not realizing that “slightly damp” cardboard is an earwig magnet they need to go, not just be reorganized.
Step 3: Reduce Humidity
What to Do: Check your home’s humidity level with a hygrometer (available for $10-20). If humidity is above 50%, turn on bathroom exhaust fans during and after showers (run for at least 30 minutes), fix any leaky faucets or pipes, ensure your dryer vent goes outside (not into the home), and run a dehumidifier in damp areas like basements.
Check that gutters and downspouts carry rainwater away from your home’s foundation. Poor drainage creates damp soil around the exterior, making it easier for earwigs to survive close to your home and eventually move inside.
Why It Matters: Earwigs are attracted to moisture. A humid home with standing water is a welcoming environment. Reducing humidity to below 50% makes your home unattractive to earwigs and prevents them from thriving even if a few enter.
What Success Looks Like: Humidity reads below 50% on your hygrometer. Bathrooms dry out within 1-2 hours of use. No visible moisture or condensation on windows or pipes.
Common Beginner Mistakes:
- Running the dehumidifier intermittently instead of continuously while fighting the infestation.
- Not fixing the underlying moisture source (leaky pipes) and expecting the dehumidifier alone to solve the problem.
- Ignoring the basement, which often stays humid and serves as an earwig breeding ground.
Step 4: Place Sticky Traps
What to Do: Place sticky traps (or rolled-up newspapers slightly dampened) along baseboards, in corners, under the kitchen sink, in the bathroom, near entry points, and in dark, damp areas. Place at least 8-10 traps throughout your home. Check traps daily and count captured earwigs to monitor the infestation level.
Why It Matters: Sticky traps catch visible earwigs and show you where the population is concentrated. This tells you which areas to focus on for sealing and which rooms have the biggest problem. Traps also reduce the current population.
What Success Looks Like: Traps capture earwigs by day 2-3. Initial trap count is high (5-15 earwigs per trap), then decreases daily as the population dwindles.
Common Beginner Mistakes:
- Placing traps only in obvious areas (kitchen) while missing hidden concentrations in the basement or crawlspace.
- Not checking traps daily, leading to escape or missed data about the infestation.
- Using non-sticky traps that earwigs can escape from provides false reassurance that the problem is solved.
- Placing traps directly under lights (earwigs are nocturnal and avoid light).
Step 5: Seal Entry Points and Gaps
What to Do: Use silicone caulk to seal cracks in baseboards, gaps around water pipes, and crevices in foundation or walls. Use weatherstripping around doors and windows. Pay special attention to areas within 1-2 feet of ground level, as this is where earwigs typically enter. For large gaps, use duct tape as a temporary seal until the caulk dries.
Why It Matters: Sealed entry points prevent new earwigs from entering while you eliminate the current population. Without sealing, your efforts are temporary.
What Success Looks Like: All identified cracks are filled with caulk; door gaps are sealed with weatherstripping; pipes entering the home are sealed around their perimeter.
Common Beginner Mistakes:
- Sealing only visible large cracks while missing small gaps that earwigs can still squeeze through.
- Not sealing areas below ground level, where the majority of entry points exist.
- Using caulk that dries fast but shrinks over time, reopening gaps. Silicone caulk is better than acrylic for durability.
Step 6: Apply Insecticide Spray (If Needed)
What to Do: If traps are still capturing high numbers of earwigs after 5-7 days, apply an insecticide spray labeled for earwigs (containing pyrethrins or bifenthrin) around baseboards, in cracks, under sinks, and in other hiding areas. Spray during the evening when earwigs are most active. Allow areas to dry fully before people or pets re-enter.
Why It Matters: While traps and moisture control work, they may be too slow for heavy infestations. Insecticide spray accelerates the killing of the remaining population.
What Success Looks Like: Trap counts drop significantly within 2 days of spraying. After 7 days of spray application, traps capture fewer than 2-3 earwigs per day.
What Attracts Earwigs to Your House?
Understanding what attracts earwigs is the first step toward preventing them from coming indoors. These insects naturally seek cool, dark, and damp environments where they can stay protected during the day. Homes with excess moisture, easy entry points, and outdoor vegetation close to the foundation are especially attractive.
Common factors that attract earwigs include:
- High indoor humidity, leaking pipes, and damp basements
- Mulch, wet leaves, compost, and decaying organic matter near the foundation
- Cracks around doors, windows, utility pipes, vents, and the foundation
- Cardboard boxes, newspapers, and other moisture-retaining storage materials
- Bright outdoor lights that attract insects during the night
- Firewood, flower pots, and garden tools stored directly against the house
Eliminating these attractants significantly reduces the chances of earwigs entering your home and helps prevent future infestations.
Common Beginner Mistakes:
- Applying spray too early (before moisture control and entry point sealing are in place), wasting product.
- Using spray as the primary method instead of a supporting tactic. Without addressing moisture and entry points, earwigs return.
- Over-spraying, which can contaminate living spaces unnecessarily.
How to Get Rid of Earwigs in Your House Fast
If you need quick results, combine several proven methods instead of relying on a single solution. Start by reducing indoor humidity below 50% using a dehumidifier or exhaust fans. Place sticky traps along baseboards, under sinks, and near suspected entry points to catch active earwigs. Seal cracks around doors, windows, pipes, and the foundation to stop new insects from entering. Remove damp cardboard, newspapers, and other hiding places that retain moisture. For heavy infestations, apply a labeled insecticide to cracks and crevices after moisture and entry-point issues have been addressed.
Most homeowners notice fewer earwigs within a few days, while complete control usually takes one to three weeks depending on the severity of the infestation.
How to Get Rid of Earwigs Indoors
Whether you’re trying to get rid of earwigs in your home, inside your house, or in specific indoor spaces, the solution is the same. Earwigs enter homes looking for moisture, darkness, and shelter, so successful indoor control focuses on eliminating these conditions rather than simply killing the insects you see.
Start by lowering indoor humidity to below 50% using a dehumidifier or proper ventilation. Remove damp cardboard, newspapers, and other clutter that provide hiding places. Seal cracks around doors, windows, pipes, and your home’s foundation to block new entry points. Place sticky traps along baseboards, under sinks, behind appliances, and in other dark areas to capture active earwigs. If the infestation is severe, apply a labeled insecticide to cracks and crevices or contact a pest control professional.
Most homeowners notice a significant reduction within one week, while complete indoor control usually takes two to three weeks when moisture control, trapping, and sealing are used together consistently.
Best Way to Get Rid of Earwigs in the House
The best way to get rid of earwigs in the house is to combine moisture control, exclusion, and population reduction instead of relying on a single treatment. Reduce humidity below 50%, repair leaks, remove damp hiding places, and seal cracks where earwigs enter. Use sticky traps to monitor activity and eliminate existing earwigs, then apply an insecticide only if trapping and prevention aren’t enough.
This integrated approach addresses both the insects you can see and the conditions attracting them, making it the most reliable long-term solution for preventing future infestations.
Earwig Infestation in the House
Seeing one or two earwigs indoors is common, but finding them regularly in multiple rooms may indicate an earwig infestation. Infestations usually occur when your home provides the moisture, shelter, and entry points these insects need to survive. Damp basements, bathrooms, crawl spaces, cardboard storage, and cracks around the foundation are some of the most common causes.
The best way to eliminate an indoor earwig infestation is to combine moisture control, sticky traps, entry-point sealing, and clutter removal. For severe infestations where dozens of earwigs appear daily, a targeted insecticide treatment or professional pest control service may be necessary. Acting early prevents the population from spreading to other areas of your home.
Earwig Removal From the House
Successful earwig removal requires more than simply killing the insects you can see. Start by lowering indoor humidity below 50%, removing damp hiding places such as cardboard and newspapers, and sealing cracks around doors, windows, pipes, and the foundation. Place sticky traps in areas where earwigs are most active to reduce the existing population and monitor progress. If the infestation is severe, apply a labeled insecticide to cracks and crevices or contact a pest control professional.
With consistent moisture control and prevention, most homeowners eliminate earwigs within two to three weeks and prevent them from returning.
How to Get Rid of Earwigs in the Garden
If earwigs are coming into your home, the problem may start outside. Gardens with damp soil, thick mulch, leaf litter, and decaying organic matter create ideal hiding places for earwigs during the day. Reducing their outdoor population can significantly lower the number that eventually finds its way indoors.
To control earwigs in the garden, remove excess mulch near your home’s foundation, clean up fallen leaves and plant debris, avoid overwatering, and improve soil drainage where possible. Place rolled-up newspaper traps or shallow containers filled with vegetable oil and soy sauce in affected areas to capture earwigs overnight. Food-grade diatomaceous earth can also be sprinkled around dry garden beds and along common travel paths, but it should be reapplied after rain.
While a few earwigs can be beneficial because they feed on aphids and other small garden pests, large populations may damage seedlings, flowers, and soft fruits. Keeping outdoor numbers under control helps reduce the chances of earwigs moving into your house.
Earwigs in Specific Rooms: Bathroom, Bedroom, and Apartments
Earwigs in Different Areas of the House
Earwigs can appear in different parts of your home depending on where they find moisture, darkness, and easy access. While the overall solution remains the same reduce humidity, seal entry points, and eliminate hiding places the exact approach may vary slightly based on the room. The sections below explain why earwigs commonly appear in bathrooms, bedrooms, and apartments, along with the most effective ways to remove them and prevent them from returning.
Earwigs in the Bathroom
Bathrooms are one of the most common places to find earwigs because they provide constant moisture, darkness, and hiding places around plumbing. Reduce humidity by running the exhaust fan after every shower, repair leaks promptly, wipe away standing water, and place sticky traps behind the toilet, under the sink, and near plumbing penetrations.
Earwigs in the Bedroom
Finding earwigs in a bedroom is usually a sign that they wandered indoors while searching for moisture or shelter rather than living in your bed. Inspect windows, baseboards, closets, and nearby exterior walls for gaps. Vacuum the room thoroughly, reduce humidity if needed, remove clutter under the bed, and place sticky traps along baseboards to identify where they’re entering.
Earwigs in an Apartment
Apartment infestations often begin in shared walls, basements, or common utility areas. Seal gaps around pipes, doors, and windows inside your unit, reduce indoor humidity, and notify property management if earwigs continue appearing because the source may be outside your apartment. Treating only one unit may provide temporary relief if the building has a larger infestation.
How to Know You Did It Correctly
Success Signs:
- Sticky traps show decreasing numbers of captured earwigs over 1-2 weeks.
- No earwigs are visible on baseboards, in the bathroom, or near entry points.
- Humidity stays consistently below 50%.
- No new earwigs appear 2-3 weeks after completing all steps.
Verification Methods:
Continue checking sticky traps for 3 weeks. If traps remain empty or capture 0-1 earwigs per week, the infestation is resolved. Do a visual inspection of entry points to confirm they’re sealed. Check humidity with a hygrometer to ensure it stays below 50%.
Expected Results:
With combined moisture control, entry point sealing, and trapping, most homeowners see significant improvement within 7-10 days and complete resolution within 2-3 weeks.
Expected Timeline and Results
When Results Appear:
- Day 1–3: Sticky traps capture high numbers of earwigs; humidity begins dropping if the dehumidifier is running.
- Days 4–7: Trap counts start declining; no new earwigs are visible in common areas; humidity is stable below 50%.
- Days 7–14: Very few earwigs captured; isolated sightings may occur in undiscovered entry points.
- Weeks 2–3: Traps remain empty or catch only occasional stragglers; infestation is considered resolved.
Normal Progress:
Earwig populations are mobile; when one area becomes inhospitable (dry, sealed), they move to another. This may temporarily increase sightings in new locations before those areas are also addressed. This is normal and indicates progress.
When to Repeat Steps:
If trap counts plateau (remain high) after 7 days despite moisture control, apply insecticide spray or repeat sealing efforts in areas where traps are busiest. If new earwigs appear after 3 weeks, repeat moisture control (humidity may have risen) and place new traps to identify new entry points.
When to Switch Methods:
If sticky traps and moisture control show no improvement after 14 days, switch to insecticide spray or consider professional help. Resistance or an unusual infestation pattern may require a pest professional’s assessment.
Alternative Methods
Rolled-Newspaper Traps (Budget-Friendly)
How It Works: Roll up a damp newspaper loosely, secure it with a rubber band, and place it in areas where earwigs are seen. Earwigs enter the roll to hide during the day. Each morning, shake the earwigs into a sealed bag and dispose of them.
Advantages:
- Zero cost (uses household materials).
- Non-toxic and safe around children and pets.
- Reusable; can be used repeatedly throughout the infestation.
- Effective for mild infestations.
Disadvantages:
- Requires daily checking and manual removal.
- Less effective than sticky traps (earwigs can escape).
- Slower results (5-10 days).
Best Use Case: Mild infestations; budget-conscious homeowners; those who prefer non-chemical methods.
Food-Grade Diatomaceous Earth
How It Works: Food-grade diatomaceous earth (DE) is a powder made from fossilized algae. When earwigs crawl through it, sharp particles damage their exoskeletons, causing dehydration.
Advantages:
- Natural and non-toxic.
- Safe around pets and children.
- Can be applied to large areas.
Disadvantages:
- Slow-acting (takes 7-14 days for full effect).
- Loses effectiveness when wet (requires reapplication after moisture).
- Less reliable than sticky traps or sprays.
Best Use Case: Mild infestations in dry climates; natural-preference households; combined with other methods for better results.
Essential Oil Barriers (Repellent, Not Killing)
How It Works: Peppermint, tea tree, or citrus essential oils mixed with water can repel earwigs from specific areas when applied to baseboards or entry points.
Advantages:
- Natural aroma; some homeowners prefer this to a chemical smell.
- Safe for all ages and pets.
- Inexpensive.
Disadvantages:
- Doesn’t kill existing earwigs.
- Effectiveness varies; many homeowners report minimal results.
- Repelled earwigs simply move to other areas (doesn’t solve the problem).
- Requires frequent reapplication.
Best Use Case: Prevention after infestation is resolved; supplemental repellent alongside primary methods; not a standalone solution.
How to Get Rid of Earwigs in Your House Naturally
If you prefer to avoid chemical insecticides, several natural methods can reduce earwig populations effectively when combined. Lower indoor humidity with proper ventilation or a dehumidifier, remove damp cardboard and clutter, and seal entry points around your home. Sticky traps and rolled-up damp newspaper traps provide chemical-free ways to capture earwigs. Food-grade diatomaceous earth can also be applied to dry cracks and crevices where earwigs travel, while peppermint or citrus essential oils may help discourage them from entering certain areas.
Natural methods work best for mild infestations and require consistency. If earwigs continue appearing after one to two weeks, combine these approaches with additional control methods.
These natural techniques also work well as DIY home remedies for mild earwig infestations and are often enough to control small indoor populations without using chemical insecticides.
DIY Home Remedies for Earwigs in the House
If you’re looking for simple DIY home remedies, start by reducing moisture because earwigs thrive in damp environments. Roll up a slightly damp newspaper and leave it overnight to trap earwigs, then dispose of it the next morning. Food-grade diatomaceous earth can be sprinkled in dry cracks and crevices to kill earwigs naturally by dehydrating them. Sticky traps placed along baseboards and under sinks also provide an effective, chemical-free solution. You can also use peppermint, tea tree, or citrus essential oil sprays as temporary repellents, although they work best alongside moisture control and sealing entry points.
DIY home remedies are most effective for small infestations. If earwigs continue appearing after one to two weeks, combine these methods with sticky traps, entry-point sealing, or a labeled insecticide for faster and longer-lasting results.
What Kills Earwigs in Your Home?
Several methods can kill earwigs indoors, but the most effective approach combines immediate control with long-term prevention. Sticky traps capture active earwigs, while insecticide sprays containing pyrethrins or bifenthrin quickly eliminate those hiding in cracks and crevices. For chemical-free control, food-grade diatomaceous earth damages their outer coating, causing them to dehydrate over time. Vacuuming visible earwigs and removing damp hiding places also helps reduce their numbers.
Keep in mind that killing earwigs alone won’t solve the problem if excess moisture and entry points remain. Lowering indoor humidity below 50%, sealing cracks, and removing clutter are essential to prevent new earwigs from entering your home.
Common Home Remedies for Earwigs
Several household remedies may help reduce earwig activity, although they work best alongside moisture control and sealing entry points.
- Roll up a damp newspaper overnight to trap hiding earwigs.
- Sprinkle food-grade diatomaceous earth in dry cracks and crevices.
- Spray diluted peppermint, tea tree, or citrus essential oils around entry points as a temporary repellent.
- Vacuum visible earwigs immediately to reduce indoor numbers.
- Remove cardboard, damp paper, and other hiding places that retain moisture.
Home remedies are most effective for mild infestations. If earwigs continue appearing after one to two weeks, combine these methods with sticky traps and targeted insecticide treatment.
Common Mistakes to Avoid
Mistake 1: Ignoring Humidity as the Core Issue
What It Is: Using traps and sprays without addressing the moisture that attracted earwigs in the first place.
Why It Happens: Traps show immediate visible results, making it feel like progress. Moisture control takes longer to show effects.
Consequences: Earwigs keep returning even after treatment ends because the home remains attractive to them.
How to Prevent: Always start with a humidity assessment. Make moisture control your foundation and traps/sprays your supporting tactics.
Mistake 2: Not Sealing Entry Points
What It Is: Removing existing earwigs while leaving cracks and gaps open.
Why It Happens: Sealing requires more effort and materials than trapping. It’s easy to overlook.
Consequences: New earwigs enter continuously, perpetuating the problem indefinitely.
How to Prevent: Identify all entry points before starting treatment. Seal them within the first 2 days of your plan.
Mistake 3: Keeping Cardboard Storage
What It Is: Moving cardboard boxes to a new location instead of removing them.
Why It Happens: Cardboard seems harmless, and homeowners don’t realize it’s a prime hiding place.
Consequences: Earwigs relocate to the new cardboard, hiding the infestation while it actually spreads.
How to Prevent: Discard all cardboard and store items in sealed plastic bins instead.
Mistake 4: Using Incorrect Traps
What It Is: Using non-sticky or non-specific traps that earwigs can escape from.
Why It Happens: Cheaper alternatives seem equivalent, but they’re not.
Consequences: False confidence that the problem is solved (earwigs escape and hide elsewhere), delaying real solutions.
How to Prevent: Use dedicated sticky traps designed for insects. Verify they’re actually sticky and earwigs don’t escape.
Mistake 5: Expecting Immediate Results
What It Is: Treating the infestation for 2-3 days, seeing no change, and assuming the method doesn’t work.
Why It Happens: Impatience and unrealistic expectations about how quickly moisture changes affect pest behavior.
Consequences: Switching methods too early, wasting money, and missing early signs of progress.
How to Prevent: Commit to 7-10 days before evaluating effectiveness. Sticky traps and moisture control need time to show results.
Why Many Attempts Fail
Reason 1: Treating Symptoms Instead of Causes
Using only traps and sprays without addressing moisture and entry points is like treating a leak by mopping instead of fixing the pipe. Earwigs return because their attractants remain.
Solution: Always address moisture first. Then seal entry points. Then use traps/sprays as finishing methods.
Reason 2: Insufficient Humidity Reduction
Running a dehumidifier for a few hours per day or only in one room keeps the rest of the house humid and attractive to earwigs.
Solution: Run the dehumidifier continuously in the most affected areas (basement, bathroom) until humidity stabilizes below 50%.
Reason 3: Overlooking Hidden Entry Points
Entry points often exist in unseen areas: under the foundation, in crawlspaces, behind appliances, or in sump pump areas.
Solution: Do a thorough inspection of all below-ground-level areas, not just visible walls and doors.
Reason 4: Not Checking Traps Regularly
Traps provide early warning of high infestation, but only if checked daily. Missed data leads to underestimating the problem.
Solution: Check traps every morning and evening. Record counts to track progress.
Reason 5: Giving Up Too Early
Most homeowners give up after 5-7 days if they don’t see dramatic improvement, not realizing results peak at days 10-14.
Solution: Commit to 2-3 weeks of consistent effort. Progress is gradual but measurable.
Troubleshooting & Common Problems
Problem | Possible Cause | Solution
| Problem | Cause | Solution |
| Traps are still catching high numbers after 7 days | Humidity remains above 50%; entry points are unsealed; new earwigs are entering faster than being caught | Increase dehumidifier use; verify humidity is below 50%; recheck for unsealed gaps; apply insecticide spray |
| New earwigs appear in different rooms | Entry points in other areas; earwigs migrating as they flee treated areas | Place traps in new problem areas; check walls and baseboards for new cracks; seal identified entry points |
| Earwigs still visible near baseboards after sealing | Caulk didn’t fully seal the gap; earwigs were hiding inside the walls; new entry points were discovered | Reapply caulk more carefully, ensuring it fills the gap; seal any newly discovered cracks |
| Traps are empty, but earwigs are still seen occasionally | Earwigs using alternate hiding places not covered by traps; very few remaining (indicates progress) | Place additional traps in new locations; continue moisture control for 1-2 more weeks; be patient final elimination is slow |
| Humidity won’t drop below 50% | Dehumidifier too small for room size; source of moisture still active (leak, condensation) | Upgrade dehumidifier size; fix leaky pipes or ensure dryer vent exits home; run exhaust fans continuously |
| Earwigs returning 2-3 weeks after treatment | Entry points reopened; humidity rising again; infestation reintroduced from outside | Reinspect and reseal entry points; check humidity level and restart dehumidifier; reapply sticky traps; may indicate ongoing exterior infestation |
| Found earwigs in insulation or attic | Earwigs nested in porous materials; a possible hidden moisture source above | Remove insulation and replace; check for roof leaks or condensation; improve attic ventilation |
Expert Tips
Tip 1: Use Sticky Traps as a Diagnostic Tool
Sticky traps do more than catch earwigs; they show you where the heaviest concentration is. Place 10-12 traps across your home. The areas with the most captures tell you where to focus sealing efforts and where hidden entry points likely exist.
Tip 2: Fix Bathroom Moisture First
Bathrooms are the biggest earwig attractants in homes. After each shower, run the exhaust fan for 30+ minutes. Install a humidity sensor that automatically triggers the fan when humidity spikes. This single change resolves many earwig issues.
Tip 3: Check the Basement and Crawlspace
Earwigs thrive in dark, damp basements and crawlspaces. If you have one, place dehumidifiers and traps there first. Many home infestations start in the basement and spread upward.
Tip 4: Seal at Ground Level and Below
Earwigs typically enter at or below ground level. Don’t waste time sealing cracks high on walls. Focus on baseboards, foundation gaps, and areas within 2 feet of ground level.
Tip 5: Replace Cardboard Storage Gradually
If you have extensive cardboard storage, you don’t need to discard it all at once, but start converting to plastic bins immediately. New cardboard brought into the house is a reinfestation risk.
Tip 6: Monitor Humidity Year-Round
Earwig problems often spike in late summer and fall when humidity rises. Maintain humidity below 50% consistently, especially during humid seasons. A permanently installed dehumidifier is better than trying to manage infestations reactively.
Tip 7: Create a Dry Zone Around Your Foundation
Keep mulch, leaves, compost, and dense vegetation at least 12–18 inches away from your home’s foundation whenever possible. This dry barrier reduces the cool, moist shelter earwigs prefer and makes it less likely they’ll migrate indoors.
When to Call a Professional
Call a Professional If:
- You’ve tried DIY methods for 3 weeks with no improvement. Professional pest control uses targeted treatments and has access to stronger products than consumer sprays.
- Earwigs are concentrated in walls, the attic, or the crawlspace. These areas require professional-grade equipment and expertise to be treated safely.
- You suspect entry points are structural (foundation cracks, large gaps). Professionals can assess and recommend structural repairs.
- Infestation is massive (traps capturing 50+ earwigs daily). This level of infestation suggests multiple entry points or a severe moisture problem requiring professional assessment.
- You have significant moisture issues (wet basement, chronic condensation). Professionals can identify the root cause and recommend solutions like sump pump installation or improved ventilation.
- You’re uncomfortable using insecticide spray or prefer to avoid chemicals. Professionals handle applications safely and can discuss non-chemical options.
Cost Expectation: Professional earwig control typically costs $150–$300 for initial inspection and treatment, with follow-up visits at $75–$150 each if needed.
What to Do Next
Immediate Follow-Up (Days 1–7):
Check sticky traps daily and record the count. Verify humidity stays below 50%. Confirm that entry points are sealed. Remove any new cardboard or clutter that enters the home.
Short-Term (Weeks 2–4):
Continue running the dehumidifier and exhaust fans. Check traps 2-3 times per week. If trap counts are low but not zero, maintain the current approach for 1-2 more weeks. If trap counts plateau high, apply insecticide spray or contact a professional.
Long-Term Prevention
- Maintain Low Humidity: Keep humidity between 30–50% year-round. In summer and fall (earwig season), aim for below 45%.
- Regular Sealing Inspection: Check sealed cracks annually and reseal if the caulk has cracked or shrunk.
- Bathroom Management: Always use exhaust fans during and 30+ minutes after showers. Keep bathroom ventilation clear.
- Storage Management: Store items in sealed plastic containers, never cardboard. Don’t leave paper bags or newspapers lying around.
- Basement Care: If you have a basement, place a permanent dehumidifier there. Ensure proper drainage around the foundation.
- Seasonal Awareness: Place sticky traps in late August and September (earwig season) as an early warning system.
Inspect Items Before Bringing Them Indoors
Earwigs often enter homes accidentally inside potted plants, cardboard boxes, newspapers, firewood, gardening tools, and outdoor furniture. Before bringing these items indoors, inspect them carefully and shake off any insects hiding underneath. This simple habit helps prevent new earwigs from entering even after you’ve eliminated an existing infestation.
Reduce Outdoor Lighting Near Entry Doors
Earwigs are active at night and may gather around brightly lit entryways because outdoor lights attract many insects and create favorable activity around doors and windows. If earwigs frequently appear near entrances, consider switching to warm-colored or yellow outdoor LED bulbs and turn off unnecessary exterior lights when possible. This small change can help reduce nighttime insect activity around your home.
How to Keep Earwigs Out of Your House
Preventing earwigs from entering your home is easier than eliminating an established infestation. Keep indoor humidity between 30% and 50%, repair plumbing leaks promptly, and use bathroom exhaust fans after showers. Seal cracks around doors, windows, pipes, and foundation walls with silicone caulk, and install weatherstripping where needed. Store belongings in sealed plastic containers instead of cardboard, trim vegetation touching your home’s exterior, and remove mulch or leaf piles that stay damp near the foundation.
Regular inspections and seasonal monitoring with sticky traps can help detect earwig activity before it becomes a larger problem.
Signs You Need Retreatment:
New earwigs appearing after 4 weeks, humidity rising above 50% for extended periods, or discovery of new entry points. Treat immediately to prevent reinfestation.
FAQs
Q1: Do earwigs bite or pinch humans?
Earwigs have pincers (cerci) but rarely use them on humans. They cannot pinch hard enough to break skin and are not aggressive toward people. The myth that they enter ears to lay eggs is completely false; they have no interest in ears or any part of the human body.
Q2: Where do earwigs hide during the day?
Earwigs are nocturnal and hide in dark, damp places during the day: under cardboard boxes, in rolled-up newspapers, under baseboards, inside wall cracks, in bathroom pipes, and in basement corners. They emerge at night to forage for food and moisture.
Q3: What attracts earwigs to homes in the first place?
The primary attractant is moisture. Earwigs need humidity above 60% to survive long-term. Secondary attractants are darkness, shelter (hiding places), and food (plant debris, fungi, other insects). A damp basement with cardboard storage is an ideal earwig habitat.
Q4: Can I use bleach or ammonia to kill earwigs?
Bleach and ammonia are not effective earwig killers. They’re harsh on surfaces and unsafe to use liberally indoors. Sticky traps, insecticide sprays, or diatomaceous earth are far better options.
Q5: How long does it take to eliminate an earwig infestation?
Most infestations resolve within 2-3 weeks using sticky traps, moisture control, and entry point sealing. Heavy infestations may take 4-6 weeks. Speed depends on your consistency with humidity control and how thoroughly you seal entry points.
Q6: Can earwigs damage my home or belongings?
Unlike termites or carpenter ants, earwigs do not damage wood or structures. They occasionally nibble plant seedlings or soft fruits, but cause no significant harm to gardens or stored goods. They’re a nuisance pest, not a destructive pest.
Q7: Do I need to hire a professional for a small infestation?
No. Small infestations (captured earwigs numbering under 10 per day) are easily handled with DIY traps and moisture control. Professional help is only needed for massive infestations, structural concerns, or failed DIY attempts.
Q8: What’s the best time of year to treat earwigs?
Earwig activity peaks in late summer and fall (August–October) when they seek shelter before winter. Treating during this window is most effective. However, if you find earwigs indoors in winter, treat them immediately if they’ve established a permanent indoor nest.
Q9: Should I remove earwigs by hand if I find one?
Yes, but wear gloves. Earwigs won’t bite, but they may pinch if trapped. You can catch an earwig in a cup, slide paper under it, and release it outside. However, if you’re dealing with an infestation, traps are more efficient than hand-catching individual earwigs.
Q10: Will earwigs infest other areas of my home if I don’t treat them?
Yes. Earwigs are mobile and will spread to other rooms over 2-4 weeks if left untreated. Early intervention prevents this spread. Starting treatment immediately after you notice earwigs keeps them confined to one or two areas instead of spreading throughout the house.
Q11: What are earwigs a sign of in the house?
Earwigs usually indicate excess moisture, high humidity, or easy access into your home through cracks and gaps. They’re attracted to damp bathrooms, basements, crawl spaces, and areas with cardboard or organic debris. Their presence doesn’t necessarily mean your home is dirty, but it often signals a moisture or entry-point problem that should be addressed.
Q12: How do I permanently get rid of earwigs in my house?
Permanent control requires eliminating the conditions that attract earwigs. Lower indoor humidity to 30–50%, seal cracks and gaps around doors, windows, pipes, and the foundation, remove damp hiding places, and continue monitoring with sticky traps. Killing the insects alone won’t solve the problem if moisture and entry points remain.
Q13: Why shouldn’t you kill earwigs?
Killing an occasional earwig isn’t harmful, but simply killing the insects you see won’t eliminate an infestation because more can continue entering through hidden gaps. Outdoors, earwigs can also feed on decaying organic matter and some small garden pests, making them mildly beneficial in certain situations. Focusing on moisture control and prevention is usually more effective than killing individual earwigs.
Q14: What smell do earwigs hate the most?
Strong scents such as peppermint, tea tree, eucalyptus, lavender, and citrus oils may help repel earwigs temporarily. However, these scents don’t eliminate an infestation and require frequent reapplication. They’re best used as a supplemental deterrent after sealing entry points and reducing humidity.
Q15: What can you spray to get rid of earwigs indoors?
For indoor infestations, use an insecticide labeled for earwigs that contains active ingredients such as pyrethrins or bifenthrin. Apply it only in cracks, crevices, baseboards, and other hiding places according to the product label. Avoid spraying large living areas, and always combine chemical treatment with moisture control and sealing entry points for lasting results.
Why Is My House Suddenly Full of Earwigs?
A sudden increase in earwigs indoors usually means environmental conditions have become more favorable for them. Heavy rain, high humidity, or hot, dry weather can drive earwigs inside in search of moisture and shelter. They often enter through cracks around foundations, doors, windows, and utility pipes. Damp basements, bathrooms, crawl spaces, and cardboard storage provide ideal hiding places once they get inside.
If you suddenly notice many earwigs, inspect your home for moisture problems, reduce humidity below 50%, seal entry points, and place sticky traps to identify where they’re entering. Addressing these conditions helps prevent recurring infestations.
Final Thoughts
Earwig infestations are among the easier household pest problems to resolve, not because they’re harmless (though they are), but because the solution is straightforward: reduce moisture, seal entry points, and use traps to manage the remaining population.
The key insight many homeowners miss is that trapping alone is a temporary band-aid. The real solution addresses why earwigs came in the first place. A home with humidity above 50%, open entry points, and cardboard storage is an earwig resort. Make your home inhospitable by drying it out and sealing it up, and earwigs will naturally leave and stay gone.
Most infestations resolve within 2-3 weeks if you commit to the three-part approach: moisture control, entry point sealing, and trapping. Stick with it, check your traps daily, and you’ll likely never see another earwig inside your home.
