
Poison ivy is one of the most frustrating plants to deal with because even brief contact causes painful blistering rashes that last weeks. The culprit is urushiol, an oil in the plant’s sap that sticks to skin, tools, and clothing long after you think you’ve cleaned up. Simply pulling the plant is risky; contact with the oil can cause severe allergic reactions.
The challenge isn’t just removal; it’s doing it safely so you don’t end up covered in a miserable rash. You need to understand what you’re dealing with, choose a removal method that matches your situation, and protect yourself throughout the process.
This guide shows you how to safely remove poison ivy using proven methods, avoid exposure to urushiol, and prevent regrowth so you don’t repeat this task every season.
Featured Snippet
The safest way to remove poison ivy is to wear protective gear (long sleeves, gloves, boots) and pull the entire plant, roots included, into a sealed bag, then wash exposed skin with soap and water immediately. For larger infestations, apply herbicide (glyphosate or triclopyr) to freshly cut stems during the growing season. Never burn poison ivy, as inhaling smoke causes severe internal allergic reactions.
Before You Begin
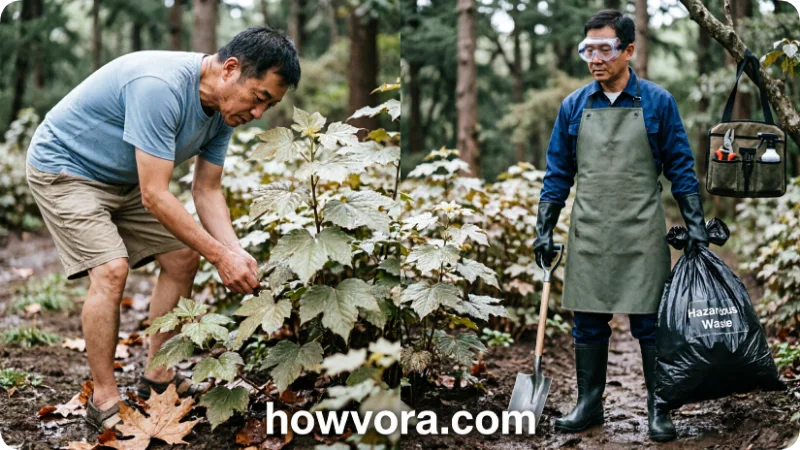
Difficulty Level: Beginner to Intermediate (depends on infestation size and location)
Time Required: 30 minutes to 2 hours for initial removal; follow-up treatments may be needed over 4-6 weeks
Estimated Cost: $15–$50 (DIY manual removal) or $50–$150 (DIY herbicide) vs. $200–$500+ (professional removal)
DIY vs. Professional: Small patches (under 50 square feet) are easily handled with DIY methods. Call a professional if the infestation covers a large area, is mixed with trees or structures you don’t want to damage, or if you’re highly allergic to urushiol.
Prerequisites: Identify poison ivy correctly (three leaflets per stem, smooth or serrated edges, white or clear berries), wear full protective gear before starting, have soap and water nearby, and know whether you’re treating the plant during growing season (May–September) or dormancy (October–April).
Choosing the Right Approach
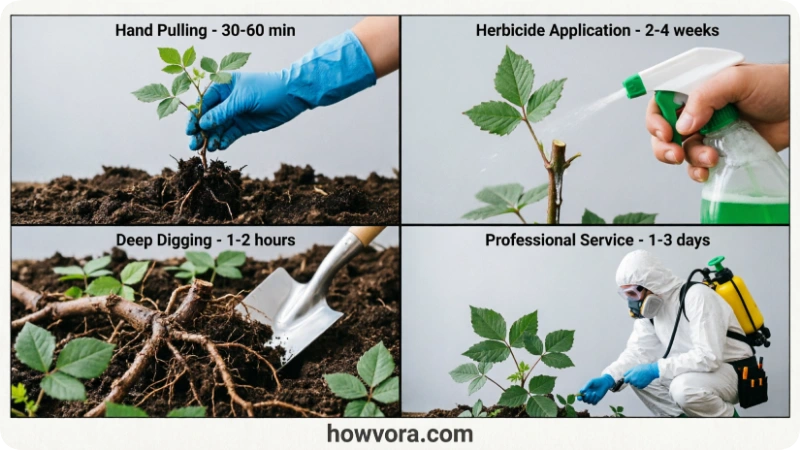
Poison ivy removal success depends on plant size, location, and how quickly you need results. Here’s how the main methods compare:
| Method | Pros | Cons | Best For |
| Hand Pulling | Zero chemicals; complete if roots removed; immediate action possible | Risk of urushiol contact; requires protective gear; small plants only; time-consuming for large patches | Small infestations; young plants; chemical-sensitive people |
| Herbicide (Glyphosate) | Effective on all plant sizes; kills roots if applied correctly; relatively low toxicity | Requires multiple applications; results take 1-2 weeks; may harm nearby plants if not careful; timing matters (growing season only) | Moderate to large infestations; persistent growth; ready to wait for results |
| Herbicide (Triclopyr) | Very effective on woody vines and established plants; doesn’t kill surrounding grass; faster than glyphosate | More expensive; requires careful application; skin contact is more irritating than glyphosate; best applied by professionals | Established poison ivy vines; woody growth; areas near desirable plants |
| Cutting + Repeated Pulling | Removes immediate threat; can be done during any season | Doesn’t kill roots; requires 4-6 weeks of repeated pulling; new growth emerges repeatedly | Immediate removal is needed; supplement to other methods |
| Professional Removal | Guaranteed results; safe application; legal liability handled; removes all roots and debris | High cost; scheduling delays; less control over methods; overkill for small patches | Large infestations; allergic individuals; complex locations |
Why Hand Pulling Is Recommended (For Small Plants): For small patches, properly protective hand pulling removes the entire plant, including roots, in one action, preventing regrowth. Herbicides require multiple applications and waiting. The key to protecting against urushiol exposure is the real risk, not the work itself.
At a Glance
| Aspect | Details |
| Difficulty | Beginner–Intermediate |
| Time to Start | 15–30 minutes |
| Time to Full Results | 1–7 days (hand pulling) or 10–21 days (herbicide) |
| Estimated Cost | $15–$150 |
| Safety Gear Essential | Yes, gloves, long sleeves, boots, eye protection |
| Reapplication Needed? | Yes, typically 1-2 follow-up treatments |
Things You’ll Need
| Item | Purpose | Notes |
| Heavy-Duty Gloves (Nitrile or Leather) | Hand protection from urushiol oil | Double-glove for extra protection; nitrile is better than latex |
| Long Sleeves and Pants | Skin protection | Wear long sleeves even in warm weather when removing poison ivy |
| Boots (Closed-Toe) | Foot and ankle protection | Prevents oil contact with skin; easier to clean than shoes |
| Garbage Bags (Heavy-Duty, Sealable) | Containment of plant material | Urushiol remains active on plant material; sealed bags prevent spread |
| Shovel or Digging Tool | Extracting roots | Essential for complete removal; prevents regrowth |
| Herbicide Spray (Glyphosate or Triclopyr) | Chemical removal method | Optional; use if manual removal fails or the infestation is large |
| Sprayer or Applicator | Applying herbicide | Trigger sprayers or pump sprayers work well |
| Soap and Water | Washing skin after removal | Plain soap works; specialized urushiol washes exist, but soap is sufficient |
| Paper Towels or Cloth | Cleaning tools and skin | Disposable is better to avoid spreading oil |
| Eye Protection (Glasses or Goggles) | Protecting eyes from sap splash | Especially important when using herbicides |
| Plastic Sheeting (Optional) | Covering nearby desirable plants during herbicide application | Prevents accidental herbicide drift |
Safety Precautions
Real Hazards and When Extra Caution Matters:
Urushiol Oil Exposure: Urushiol is the allergen causing poison ivy rash. It’s present in all parts of the plant, leaves, stems, roots, and even dead plant material. It can remain active for years on tools and clothing. Even trace amounts (smaller than a pinhead) can cause reactions. Wear protective gear always, no exceptions.
Severe Allergic Reactions: Most people develop mild to moderate rashes (itching, blistering). Severe reactions involve swelling around the eyes, mouth, or genitals, difficulty breathing, or fever. If you experience severe reactions, seek medical attention immediately. Individuals with previous severe reactions should never handle poison ivy; instead, they should use professionals or extreme precautions only.
Smoke Inhalation Hazard: Never burn poison ivy. Urushiol oil vaporizes in smoke and enters your lungs, causing internal allergic reactions that are far more dangerous than skin contact. This can cause severe respiratory distress and requires emergency medical care. Burning poison ivy is never worth the risk.
Herbicide Safety: Most herbicides used for poison ivy (glyphosate, triclopyr) are moderately toxic to humans. Avoid skin contact, avoid inhaling spray mist, and keep out of reach of children and pets. Read product labels completely and follow all precautions. Some herbicides kill nearby plants. Apply carefully.
Tool Contamination: Tools (shovels, pruners, etc.) that contact urushiol remain contaminated. After use, wash tools thoroughly with soap and water, or wear dedicated tool gloves that you later discard. Never reuse tools without cleaning.
Clothing Contamination: Wash clothes worn during poison ivy removal separately from other laundry using hot water and detergent. Dried urushiol on fabric can reactivate if touched or washed without care. Wearing a dedicated removal outfit that you wash separately is safer than wearing clothes you’ll mix with family laundry.
Step-by-Step Guide
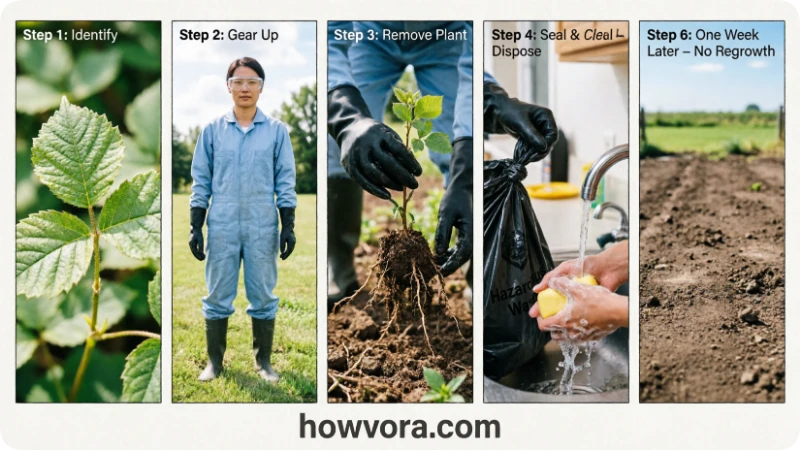
Step 1: Identify Poison Ivy Correctly
What to Do: Look for three leaflets per stem (the classic “leaves of three, let it be” rule). The center leaflet has a longer stem than the two side leaflets. Leaf edges can be smooth or serrated. In spring, leaves are reddish; in summer, green; in fall, red, orange, or yellow. Berries are white, off-white, or pale yellow (never black or red). Poison ivy grows as a ground cover, climbing vine, or shrub.
Why It Matters: Misidentification is dangerous. You might treat the wrong plant and leave the real poison ivy untouched. Alternatively, you might unnecessarily risk exposure to a non-toxic plant. Correct ID ensures your efforts are directed at the real threat.
What Success Looks Like: You’ve positively identified poison ivy using multiple characteristics (three leaflets, stem arrangement, berry color). You’re confident this is poison ivy, not Virginia creeper, blackberry, or another three-leafed plant.
Common Beginner Mistakes:
- Assuming any three-leafed plant is poison ivy (Virginia creeper is often confused).
- Not checking berry color to confirm identity (white berries = poison ivy; black berries = likely not).
- Identifying the plant incorrectly and treating the wrong species.
- Not checking the entire area for additional poison ivy patches (which often appear in clusters).
Step 2: Put on Full Protective Gear
What to Do: Before any removal attempt, dress completely: long pants, long-sleeve shirt, heavy-duty gloves (doubled for extra protection), boots, and eye protection. Ensure no skin is exposed between the wrist and elbow or ankle and the knee.
Why It Matters: Urushiol oil contacts exposed skin within seconds. Even minimal protection gaps can lead to rash exposure. Full coverage is non-negotiable.
What Success Looks Like: You cannot see any exposed skin on arms or legs. Gloves extend fully over the wrist. Boots are laced and cover the ankles. You’re dressed for full protection, not just “mostly protected.”
Common Beginner Mistakes:
- Thinking short sleeves and a glove are enough (“I’ll just be quick”).
- Wearing loose gloves that slip off during pulling.
- Forgetting eye protection, risking sap splash directly to the eyes.
- Wearing clothing that will be worn again around family (contaminating household items).
Step 3: Choose Your Removal Method (Small Plants: Manual Pulling)
What to Do: For small plants (under 3 feet tall, not woody), grasp the base firmly with both gloved hands and pull steadily upward. The goal is to remove the entire plant, including roots. Once removed, immediately place the plant into a heavy-duty sealed garbage bag.
Why It Matters: Removing the entire plant (especially roots) prevents regrowth. Leaving roots behind means the plant returns in 2-4 weeks. Quick bagging of the plant prevents urushiol exposure and prevents the plant from being accidentally touched again.
What Success Looks Like: The entire plant comes out cleanly with roots intact. The plant is immediately sealed in a garbage bag. No soil or plant material is scattered around the removal area.
Common Beginner Mistakes:
- Only pulling the above-ground stems and leaving roots, which resprout.
- Leaving the pulled plant sitting on the ground, leading to accidental contact later.
- Throwing the removed plant into a regular garbage can (it can spread to sanitation workers).
- Not pulling vertically, pulling sideways can break stems and leave roots behind.
Step 4: Choose Your Removal Method (Large Plants/Vines: Herbicide Application)
What to Do: For large plants or persistent growth, cut the plant as close to ground level as possible. Immediately apply herbicide (glyphosate or triclopyr) to the freshly cut stem surface using a sprayer or applicator. Apply during growing season (May–September) for best results. Follow product instructions for dilution and safety. Wear all protective gear while spraying.
Why It Matters: Herbicide applied to freshly cut stems is absorbed directly into the plant’s vascular system, killing roots below ground. This prevents regrowth. Applying during the growing season ensures the plant is actively transporting nutrients and herbicides downward to the roots.
What Success Looks Like: Herbicide is applied within minutes of cutting. The application covers the entire cut surface. No overspray reaches nearby desirable plants.
Common Beginner Mistakes:
- Cutting the plant days before applying herbicide (the cut surface dries and the herbicide won’t absorb).
- Applying herbicide to leaves instead of cut stems (less effective).
- Spraying during dormancy (fall/winter) when the plant isn’t transporting nutrients.
- Over-spraying and killing nearby plants unintentionally.
Step 5: Monitor for Regrowth and Repeat as Needed
What to Do: Check the removal site weekly for new growth. If the plant regrows, repeat the removal method. Most poison ivy requires 2-3 removal cycles over 4-6 weeks to fully eliminate.
Why It Matters: Roots are persistent. Even complete-looking removal sometimes leaves small root fragments that sprout new growth. Repeated treatments exhaust the root system’s energy reserves, eventually killing it completely.
What Success Looks Like: Initial removal is followed by either no regrowth (success on first try) or minimal regrowth that can be pulled or sprayed again. By week 6, no new growth appears.
Common Beginner Mistakes:
- Stopping after the first removal and assuming the job is done, only to have the plant return in 2-3 weeks.
- Not checking regularly for regrowth.
- Treating regrowth with different methods (confusing results).
- Giving up after one failed attempt instead of retrying or switching methods.
Step 6: Clean Yourself and Tools
What to Do: Remove gloves carefully by peeling them off from the wrist without touching the outer (contaminated) surface. Immediately wash your skin with soap and water for at least two minutes, focusing on areas that may have come into contact with urushiol, such as the wrists, neck, and face. Next, launder any clothing worn during removal separately in hot water. Finally, clean your tools with soap and water or reserve them exclusively for poison ivy removal.
Why It Matters: Urushiol can remain on skin for hours and cause severe rashes if not removed. Removing gloves incorrectly can transfer oil to the hands. Tools recontaminate gloves on future uses, keeping the cycle going.
What Success Looks Like: You’ve washed your hands and any exposed areas thoroughly. Clothes are in a separate laundry load. Tools are clean or will be used only for poison ivy removal in the future.
Common Beginner Mistakes:
- Not removing gloves properly and transferring oil to hands.
- Washing with only water (not soap urushiol is oil-based and requires soap to remove.
- Contaminating family laundry by washing clothes with other items.
- Reusing tools without cleaning perpetuates oil contamination.
How to Know You Did It Correctly
Success Signs:
- No new poison ivy growth appears within 7-10 days after removal.
- No rash develops on your skin (indicates successful protective gear use).
- All plant material is disposed of safely (sealed bag, not in regular trash).
- Tools are clean or designated for future poison ivy use only.
Verification Methods:
Check the removal site weekly for 6 weeks. Look for any new leaves or stems emerging from the roots. If nothing grows back by week 6, removal was successful. If regrowth appears, treat it immediately using the same method.
Expected Results:
Manual removal of small plants shows 100% success if roots are completely extracted. Herbicide application shows 80-90% success on the first application, with regrowth killed by follow-up treatments. Multiple applications eventually achieve full elimination.
Expected Timeline and Results
When Results Appear:
- Day 1 (Manual Removal): Plant is physically gone; you must now watch for regrowth from root fragments.
- Days 1–3 (Herbicide): No visible change; herbicide is moving through the plant’s system.
- Days 4–7 (Herbicide): Leaves begin to wilt and discolor; stem yellows or browns.
- Days 7–14 (Herbicide): Plant is clearly dying; all visible above-ground growth is dead.
- Weeks 2–4: Root system is dead, and no regrowth appears. Success is confirmed.
Normal Progress:
Herbicide works more slowly than manual removal but more thoroughly. You’ll see wilting before death, which is normal. Some regrowth may appear weeks later as dormant buds sprout, requiring follow-up treatment.
When to Repeat:
If regrowth appears 2-3 weeks after removal, repeat the same method immediately. Don’t wait; early intervention is faster than dealing with a reestablished plant.
When to Switch Methods:
If manual pulling didn’t work (regrowth appeared), switch to herbicide. If herbicide application didn’t work after two attempts, professional removal is warranted, or the plant may have extremely deep roots requiring excavation.
Alternative Methods
Boiling Water Method
How It Works: Pour boiling water directly on poison ivy to kill the leaves and above-ground growth immediately.
Advantages:
- Free or nearly free (just heating water).
- No chemicals involved.
- Immediate visible results.
Disadvantages:
- Doesn’t kill roots; the plant regrows within weeks.
- Risk of burns to yourself and nearby plants.
- Boiling water doesn’t ensure complete plant death.
Best Use Case: Emergency removal when you need immediate action, followed by herbicide or repeated pulling to kill roots.
Digging Out the Entire Root System
How It Works: Use a shovel to dig down 12+ inches and remove the entire root system, not just the visible plant.
Advantages:
- Complete one-time removal if done thoroughly.
- No chemicals involved.
- Prevents all regrowth if roots are fully extracted.
Disadvantages:
- Extremely labor-intensive and time-consuming.
- Risk of urushiol contact while digging.
- Creates a large hole that may need backfilling.
- Suitable only for small patches in yards or non-structural areas.
Best Use Case: Small, isolated patches in areas where you can afford to disrupt soil; determined homeowners who prefer no chemicals.
Smothering with Plastic
How It Works: Cover the poison ivy plant with thick plastic sheeting (black landscape plastic or tarp) for 1-2 years, blocking sunlight and eventually killing the plant.
Advantages:
- No chemicals; passive method.
- Safe; no direct contact needed.
- Works eventually.
Disadvantages:
- Requires 12-24 months extremely slow.
- Unsightly during the process.
- Not practical for most homeowners.
- Covers the area entirely, preventing other uses.
Best Use Case: Small patches in out-of-the-way areas where long-term coverage is acceptable; as a preventive measure for regrowth areas.
Common Mistakes to Avoid
Mistake 1: Burning Poison Ivy
What It Is: Using fire or a torch to burn poison ivy plants.
Why It Happens: It seems like an effective, fast method; people underestimate the danger.
Consequences: Urushiol oil vaporizes in smoke and enters your lungs, causing severe internal allergic reactions. This can result in difficulty breathing, throat swelling, and hospitalization. It’s far more dangerous than skin contact.
How to Prevent: Never burn poison ivy under any circumstances. Use manual removal or herbicide instead.
Mistake 2: Pulling Without Protective Gear
What It Is: Attempting quick removal without gloves, long sleeves, or other protection.
Why It Happens: “Just a quick removal” seems safe; the job appears small and simple.
Consequences: Direct urushiol contact results in severe rash, blistering, and weeks of discomfort. You may contaminate your home by touching household items with oily hands.
How to Prevent: Always wear full protective gear before touching any part of poison ivy, even if it’s just to relocate it.
Mistake 3: Leaving Roots Behind
What It Is: Pulling or cutting the plant but leaving roots in the ground.
Why It Happens: Roots are underground and not obviously visible; people assume the plant is gone once above-ground growth is removed.
Consequences: The plant regrows within 2-4 weeks, requiring the entire removal process to be repeated. You’re back to square one.
How to Prevent: Always dig out the root system when hand pulling. If using an herbicide, apply it to cut stems to kill roots chemically. Verify complete root removal by checking for regrowth at 2 and 4 weeks.
Mistake 4: Contaminating Laundry and Tools
What It Is: Washing clothes worn during removal with regular laundry or reusing tools without cleaning.
Why It Happens: Underestimating how long urushiol persists; assuming one wash is sufficient.
Consequences: Other family members develop rashes from contaminated clothes or tools. Urushiol spreads through the household.
How to Prevent: Always wash removal clothes separately in hot water. Dedicated tool cleaning or tool dedication prevents cross-contamination.
Mistake 5: Treating During Dormancy
What It Is: Applying herbicide to poison ivy in fall/winter when the plant is dormant.
Why It Happens: Thinking removal is removal; not realizing timing matters for herbicide effectiveness.
Consequences: Herbicide is not absorbed into the root system because the plant isn’t actively transporting nutrients. Treatment fails, and the plant regrows in spring.
How to Prevent: Apply herbicide during growing season (May–September) only. In winter, use manual removal instead.
Why Many Attempts Fail
Reason 1: Incomplete Root Removal
Most failures result from roots surviving underground. The plant looks gone, but regrows weeks later.
Solution: When hand pulling, ensure the entire root system is extracted. When using an herbicide, verify that the product penetrates cut stems to kill roots. Follow up 4 weeks later to confirm no regrowth.
Reason 2: Single Treatment Mindset
Many people expect one removal attempt to permanently solve the problem. Poison ivy often requires multiple treatments.
Solution: Plan for 2-3 removal cycles over 4-6 weeks. Schedule weekly checks for regrowth and treat immediately when found.
Reason 3: Herbicide Applied Incorrectly
Applying herbicide to leaves instead of cut stems, or not saturating the cut surface, reduces effectiveness significantly.
Solution: Always cut first, then immediately apply herbicide to the freshly cut stem surface. Saturate the cut area thoroughly.
Reason 4: Wrong Timing
Treating during dormancy or in the fall when the plant is preparing to die naturally anyway wastes effort.
Solution: Treat during the active growing season (May–September). Winter/dormancy removal requires manual methods.
Reason 5: Environmental Spread
New poison ivy plants arrive via seeds spread by birds or roots in nearby soil. Treating one patch while the environment keeps spreading it is fighting a losing battle.
Solution: After removing primary patches, monitor the area regularly and treat new growth immediately. Consider environmental controls (clearing bird-attracting berries, improving yard sanitation).
Troubleshooting & Common Problems
| Problem | Cause | Solution |
| Plant regrows 2-3 weeks after removal | Roots not fully extracted; root fragments survived | Repeat removal using herbicide on cut stems; monitor for 4 more weeks; if regrowth persists, consider professional removal |
| Rash develops after removal | Urushiol contact despite gear; contaminated tools/clothes | Wash affected area immediately with soap and water; treat rash with over-the-counter itch relief; review protective gear usage for future removals |
| Nearby desirable plants affected by the herbicide | Overspray during application; the herbicide contacted the wrong plants | Rinse affected plants with water immediately; use more careful application next time; consider hand pulling instead to avoid drift |
| Leaves wilt but don’t die (herbicide) | Herbicide applied to leaves instead of cut stems; old/expired product | Reapply herbicide to freshly cut stems; verify product hasn’t expired; if still no results, switch to manual removal |
| Extremely thick vines or woody growth won’t pull | The plant is an established woody vine (age 5+ years); roots run deep | Don’t force pulling use herbicide instead; apply to freshly cut vines; may require multiple applications over weeks |
| New poison ivy appears in different areas | Birds spreading seeds; roots in connecting soil; environmental spread | Remove new plants as found; maintain regular yard monitoring; consider professional treatment if spread is widespread |
| Severe rash or swelling develops | Severe allergic reaction; possible internal exposure; contaminated exposure | Seek medical attention immediately; contact poison control if breathing difficulty; do not attempt further DIY removal. |
Expert Tips
Tip 1: Use Herbicide on Cut Stems, Not Leaves
Herbicide applied to freshly cut stems is far more effective than spraying leaves. Cut the plant, wait less than a minute, then apply herbicide to the cut surface. This ensures direct delivery to the root system.
Tip 2: Treat Early in the Season
Treating poison ivy in May or June (early growth) requires less herbicide and is faster than treating established plants in August. The smaller the plant, the easier the removal.
Tip 3: Check for Regrowth Obsessively During Weeks 2–4
Most regrowth appears in this window. Treat regrowth immediately. Repeated small treatments are faster and cheaper than waiting for massive regrowth to reestablish.
Tip 4: Dedicated Removal Outfit
Wear clothes you don’t mind discarding or washing separately every time you work in poison ivy areas. Keep gloves and boots designated for poison ivy removal only. This eliminates cross-contamination risk.
Tip 5: Seal Disposal Carefully
Place bagged plant material directly into a sealed garbage bag. Double-bagging is even safer. Never compost poison ivy or leave it in an open pile where children or animals might contact it.
Tip 6: Document Treatment with Photos
Take before and after photos of removal areas. This helps you monitor for regrowth and confirms success over time.
When to Call a Professional
Call a Professional If:
- You have severe allergic reactions to urushiol. Professionals have experience and equipment to protect themselves and you. Don’t risk exposure.
- The infestation is massive (covers 1,000+ square feet). DIY becomes impractical. Professionals can treat large areas efficiently.
- Poison ivy is growing on trees, structures, or near utilities. Risk of injury or property damage is high. Professionals have proper equipment and liability insurance.
- DIY removal has failed twice. You’ve attempted removal 2+ times, and the plant returns each time. Professionals can identify the reason and use stronger methods (excavation, stronger herbicides, etc.).
- Poison ivy is mixed with other challenging plants or dense vegetation. Professional equipment and knowledge are needed to selectively remove poison ivy without damaging surroundings.
- You suspect you’ve been exposed to urushiol and are developing a severe rash. Seek medical attention, not additional DIY removal.
Cost Expectation: Professional poison ivy removal typically costs $200–$500+ depending on infestation size and location, often with follow-up treatments included.
What to Do Next
Immediate Follow-Up (Days 1–7):
Monitor the removal site daily for any signs of regrowth. Check your skin for rash development. Wash and dry clothes worn during removal separately. Clean any tools used.
Short-Term (Weeks 2–4):
Check the removal site twice weekly for regrowth. If regrowth appears, treat it immediately using the same method. This is the critical window where multiple small treatments prevent massive regrowth.
Long-Term Prevention:
- Maintain Regular Monitoring: Walk your property monthly during growing season (May–September) and check for poison ivy. Treat any new growth immediately before it establishes.
- Remove Nearby Hazards: Check for poison ivy along fence lines, near pathways, and around property edges where you frequently move through. Early removal prevents accidental contact.
- Clear Debris: Remove fallen branches, dead vegetation, and yard clutter where poison ivy seeds can hide and germinate.
- Educate Family: Ensure children and visitors recognize poison ivy and know not to touch it. Post a “Poison Ivy” sign in affected areas if they’re within household access.
- Protective Barriers: In areas where poison ivy commonly returns, consider installing ground cover (landscape cloth) or maintaining lawn coverage (poison ivy struggles in mowed grass).
Signs You Need Retreatment:
New poison ivy growth at the original site (indicating root survival), expansion of remaining patches (indicating continued spread), or new infestations in nearby areas (indicating environmental seed spread). Treat immediately.
FAQs
Q1: Can I get a rash from dead poison ivy plants?
Yes. Urushiol oil remains active on dead plant material for years. A dead vine on the ground is just as dangerous as a living one. Always treat dead poison ivy with the same protective precautions as live plants.
Q2: What should I do if I touch poison ivy accidentally?
Wash the affected area immediately with soap and water. The sooner you wash, the less urushiol penetrates the skin. Washing within 15 minutes can significantly reduce rash severity. Use soap oil-based urushiol requires soap to remove, not just water.
Q3: Can I use household bleach to kill poison ivy?
Bleach is not effective at killing poison ivy and is harsh on plants and soil. Herbicides (glyphosate, triclopyr) or manual removal are far superior methods. Don’t waste time with bleach.
Q4: Is poison ivy contagious from person to person?
No. The rash itself is not contagious. However, urushiol on clothing, tools, or skin can spread to others. Wash contaminated items and warn others not to touch them. The rash comes from the oil, not the rash itself.
Q5: Can I burn dead poison ivy after it’s been dead for a year?
No. Urushiol remains active for years, even on completely dead plant material. Never burn poison ivy under any circumstances, regardless of how dead or old it is.
Q6: How long does a poison ivy rash last?
Typical rashes last 1-3 weeks depending on severity. Severe reactions may take up to a month. Treatment with topical steroids or antihistamines can reduce duration. See a doctor if the rash persists beyond 3 weeks or is severe.
Q7: Does poison ivy have different seasonal appearances?
Yes. Spring: reddish new growth. Summer: green leaves. Fall: red, orange, or yellow coloring. Winter: bare stems with white berries. It’s identifiable year-round, but the appearance changes seasonally.
Q8: Can goats or sheep eat poison ivy without getting a rash?
Yes. Goats and sheep are immune to urushiol and will eat poison ivy without developing rashes. Some people use animals for poison ivy management, but this is overkill for most homeowners and not practical unless you have large land and existing livestock.
Q9: What’s the difference between poison ivy, poison oak, and poison sumac?
All three contain urushiol and cause similar rashes.Poison ivy typically has three leaflets on each stem. In contrast, poison oak also features three leaflets, but its leaves resemble those of an oak tree. Poison sumac differs from both plants because it produces 7 to 13 leaflets per stem.
Q10: Can I plant grass over poison ivy to smother it?
Overseeding with grass alone won’t kill established poison ivy the roots are too deep. However, maintaining thick lawn coverage prevents new poison ivy seeds from germinating. Combine grass overseeding with removal of existing plants for best prevention.
Final Thoughts
Poison ivy removal is manageable with the right approach and protective precautions. The key is understanding that urushiol is the real enemy, not the plant itself. Protect yourself thoroughly, remove the entire plant including roots, and follow up with monitoring for regrowth.
Most people can successfully remove small to moderate poison ivy infestations using manual pulling or herbicide application. The process takes 4-6 weeks from initial removal to complete confirmation of success, but it’s straightforward. The mistake people make most often is stopping after the first removal attempt and assuming the job is done, only to watch the plant return weeks later.
Start with protection, move to complete removal (roots included), and commit to 2-3 follow-up weeks of monitoring and treatment if needed. You’ll successfully eliminate poison ivy and prevent it from returning. If the infestation is massive or you’re highly allergic, professional removal is a reasonable investment.
Your yard can be poison-ivy-free. Start removal today, follow the steps carefully, and you’ll likely never deal with it again.
