
Starting seeds indoors gives vegetables, herbs, and flowers a strong beginning, but moving them directly outside can quickly damage or even kill them. Indoor seedlings are used to stable temperatures, gentle light, and protection from wind. Outdoor conditions are much harsher.
Learning how to harden off seedlings gradually prepares young plants for life outdoors. This simple process strengthens stems, reduces transplant shock, and helps seedlings adapt to direct sunlight, cooler nights, changing temperatures, and wind before they’re planted in the garden.
If you’re growing tomatoes, peppers, cucumbers, herbs, annual flowers, or leafy greens, following a proper hardening-off schedule will improve survival rates and encourage healthier growth after transplanting.
Featured Snippet
To harden off seedlings, gradually expose them to outdoor conditions over 7–10 days. Start by placing seedlings in a shaded, sheltered location for a few hours, then slowly increase their time outdoors and their exposure to sunlight, wind, and cooler temperatures. Bring them indoors each night until they’re fully acclimated and ready for transplanting.
Before You Begin
| Factor | Details |
| Difficulty | Easy |
| Total Time | 7–10 days |
| Cost | Free (unless using shade cloth or cold frame) |
| Skill Level | Beginner |
| DIY or Professional | DIY |
| Best Time | 1–2 weeks before transplanting |
| Ideal Weather | Mild, calm days between 55°F–75°F (13°C–24°C) |
Prerequisites
Before starting the hardening-off process:
- Seedlings should have at least 2–3 sets of true leaves.
- Plants should appear healthy with sturdy stems.
- Check your area’s average last frost date.
- Prepare the outdoor planting location beforehand.
- Watch the weather forecast for severe wind, frost, hail, or extreme heat.
Hardening off isn’t something you rush. Waiting for a stretch of relatively mild weather makes the transition much easier.
Choosing the Right Approach
There isn’t just one way to harden off seedlings. The best method depends on your climate, schedule, and available space.
| Method | Best For | Advantages | Drawbacks |
| Traditional Outdoor Schedule | Most home gardeners | Reliable and simple | Requires daily movement |
| Cold Frame | Cooler climates | Protects seedlings while acclimating | Requires a cold frame |
| Covered Porch or Patio | Beginners | Reduces sun stress | Slower light adaptation |
| Greenhouse Venting | Greenhouse-grown seedlings | Convenient | Less exposure to natural wind |
Which Method Is Best?
For most gardeners, the traditional outdoor method offers the best balance of simplicity and effectiveness. It exposes seedlings to real outdoor conditions while allowing you to control the pace of acclimation.
A useful step many guides skip is matching the hardening-off schedule to the weather rather than the calendar. If an unexpected heat wave, cold snap, or strong winds arrive, pause the schedule for a day instead of pushing seedlings through stressful conditions.
At a Glance
| Category | Information |
| Primary Goal | Prepare seedlings for outdoor growing |
| Average Hardening Period | 7–10 days |
| Daily Outdoor Time | Gradually increase from 1–2 hours to a full day |
| Sun Exposure | Increase each day slowly |
| Water Needs | Keep soil consistently moist but not soggy |
| Night Protection | Bring indoors until fully hardened |
| Best Weather | Mild, calm, frost-free conditions |
Things You’ll Need
| Item | Purpose |
| Healthy seedlings | Plants ready for transplanting |
| Seed trays or pots | Easy transport |
| Watering can | Maintain moisture |
| Garden gloves | Handling plants |
| Small table or bench | Keep seedlings off hot ground |
| Shade cloth (optional) | Reduce intense afternoon sun |
| Plant labels | Keep varieties organized |
| Weather forecast | Plan daily exposure safely |
Safety Precautions
Although hardening off is low-risk, a few precautions can prevent setbacks.
- Never place indoor seedlings into full afternoon sun on the first day.
- Avoid exposing seedlings to frost.
- Keep plants away from strong wind until stems strengthen.
- Don’t let containers dry out while outdoors.
- Protect seedlings from heavy rain or hail.
- Bring plants inside if temperatures suddenly drop overnight.
- Keep pets from knocking over trays.
- Inspect plants daily for insects before bringing them back indoors.
Step-by-Step Guide
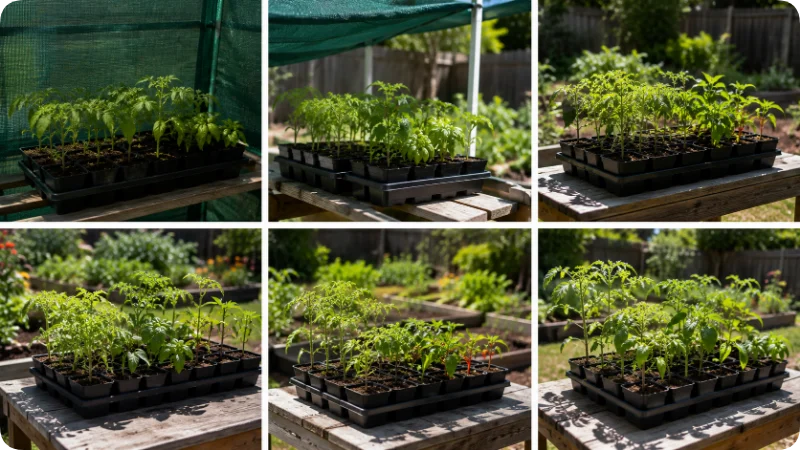
Step 1: Check That Seedlings Are Ready
Healthy seedlings adapt much better than weak or leggy ones.
Look for:
- Multiple true leaves
- Thick stems
- Healthy green foliage
- Well-developed roots without becoming root-bound
Why it matters
Weak seedlings struggle to recover from environmental stress, even if hardened off correctly.
Common mistake
Starting the process while seedlings still only have seed leaves (cotyledons).
Step 2: Choose a Mild First Day
Pick a calm, overcast day whenever possible.
Ideal conditions include:
- Light breeze
- Mild temperatures
- No heavy rain
- No intense afternoon sun
Place seedlings outside in complete shade for 1–2 hours.
This allows them to experience outdoor temperatures and airflow without being overwhelmed by direct sunlight.
Step 3: Bring Seedlings Back Indoors
After their first outdoor session, move the seedlings back inside.
Inspect them for signs of stress:
- Wilting
- Leaf curling
- Bleached foliage
- Dry soil
Light wilting can happen temporarily, but plants should recover within a few hours indoors.
Water only if the soil feels dry. Overwatering after every outdoor session is a common mistake.
Step 4: Increase Outdoor Time Each Day
Gradually extend outdoor exposure.
A typical schedule looks like this:
| Day | Outdoor Time | Sun Exposure |
| Day 1 | 1–2 hours | Full shade |
| Day 2 | 2–3 hours | Mostly shade |
| Day 3 | 3–4 hours | Morning sun only |
| Day 4 | 4–5 hours | Morning sun + light breeze |
| Day 5 | 5–6 hours | Partial sun |
| Day 6 | 6–8 hours | Longer sun exposure |
| Day 7 | Full day | Nearly normal conditions |
| Day 8–10 | Full day + overnight if temperatures stay suitable | Ready for transplanting |
Rather than following the schedule rigidly, adjust based on weather. Cloudy days allow for slightly longer exposure, while unusually hot or windy days may require shorter sessions.
Step 5: Gradually Introduce Direct Sunlight
Sunlight is usually the biggest shock for indoor-grown seedlings.
Start with:
- Early morning sun
- Filtered sunlight
- Bright shade
Avoid:
- Midday summer sun
- Hot patios
- Reflective concrete
- South-facing walls that trap heat
Plants should receive progressively more sunlight each day until they can tolerate the conditions they’ll experience after transplanting.
Why it matters
Leaves grown indoors contain less protective pigment and thinner tissue. Gradual exposure allows them to develop better resistance to ultraviolet light and heat without scorching.
Step 6: Gradually Expose Seedlings to Wind
Indoor seedlings rarely experience moving air, so their stems are often thin and flexible. Gentle wind encourages stronger stem development and helps plants become more resilient after transplanting.
Start with:
- A light breeze for short periods
- Sheltered locations such as a covered porch or beside a fence
- Increasing exposure gradually over several days
Avoid placing seedlings in strong gusts or stormy weather. If the wind is strong enough to tip over containers or bend stems sharply, move the plants to a more protected area.
Why it matters
Wind strengthens plant tissues and reduces the chance of seedlings collapsing once planted outdoors.
Common mistake
Leaving seedlings in windy conditions too early, causing broken stems or excessive moisture loss.
Step 7: Reduce Pampering
Indoor plants often receive perfect conditions: regular watering, stable temperatures, and protection from the elements.
As seedlings harden off:
- Continue watering when the soil begins to dry.
- Avoid keeping the soil constantly soaked.
- Stop excessive fertilizing during the final week before transplanting.
- Allow seedlings to experience normal daytime temperature changes.
The goal isn’t to stress the plants but to help them adapt naturally.
Step 8: Watch for Signs of Stress
Check your seedlings each time you bring them indoors.
Healthy seedlings should remain:
- Upright
- Green
- Firm
- Actively growing
Watch for warning signs such as:
- Bleached or white patches on leaves
- Crispy leaf edges
- Severe wilting
- Broken stems
- Purple leaves caused by cold stress
If you notice significant damage, reduce outdoor exposure for a day or two before continuing the schedule.
A brief pause is much better than losing the plants entirely.
Step 9: Leave Seedlings Outdoors Overnight
Once seedlings have spent full days outside without signs of stress, they’re nearly ready.
Leave them outdoors overnight only if:
- Frost is no longer expected.
- Night temperatures are appropriate for the crop.
- Winds remain light.
- Heavy rain isn’t forecast.
Warm-season crops like tomatoes, peppers, eggplants, basil, and cucumbers appreciate warmer nighttime temperatures, while cool-season crops such as lettuce, broccoli, cabbage, kale, onions, and spinach tolerate cooler nights more easily.
Step 10: Transplant Promptly
After completing the hardening-off period, transplant seedlings within a day or two.
For the best results:
- Water seedlings before transplanting.
- Plant during the morning or late afternoon.
- Avoid transplanting during the hottest part of the day.
- Water thoroughly after planting.
- Add mulch if appropriate for the crop.
Waiting too long after hardening off can slow growth because seedlings become crowded in their containers.
How to Know You Did It Correctly
Properly hardened seedlings usually show several positive signs before transplanting.
Look for:
- Thick, sturdy stems
- Healthy green leaves
- No significant wilting outdoors
- Upright growth throughout the day
- Ability to tolerate direct sunlight without scorching
- Steady growth after transplanting
One verification step many gardening guides overlook is observing seedlings for an entire sunny afternoon. If they remain upright and healthy without drooping, they’re generally ready for permanent planting.
Expected Timeline and Results
| Time | Expected Result |
| Day 1–2 | Plants begin adjusting to outdoor temperatures. |
| Day 3–5 | Stems strengthen and plants tolerate longer outdoor periods. |
| Day 6–8 | Plants adapt to increased sunlight and airflow. |
| Day 8–10 | Most seedlings are ready for transplanting. |
| 1 Week After Transplanting | New growth appears with minimal transplant shock. |
| 2–3 Weeks After Planting | Plants establish roots and resume vigorous growth. |
Some crops may need an extra few days if weather conditions are unusually cool or windy.
Alternative Methods
Cold Frame
A cold frame provides a protected outdoor environment that allows seedlings to adjust more gradually. Open the lid a little more each day until plants are fully acclimated.
Best for:
- Cool climates
- Early spring gardening
Unheated Greenhouse
An unheated greenhouse offers a transition between indoor and outdoor conditions while protecting seedlings from heavy rain and wind.
Best for:
- Large numbers of seedlings
- Variable spring weather
Covered Porch or Patio
A shaded porch works well during the first few days of hardening off because it limits direct sunlight while still exposing seedlings to outdoor temperatures and airflow.
Best for:
- Beginners
- Delicate flowers
- Herbs
Common Mistakes to Avoid
- Moving seedlings directly into full sun.
- Ignoring weather forecasts.
- Forgetting to water container plants.
- Leaving plants outside during frost.
- Skipping the hardening-off process entirely.
- Increasing sunlight too quickly.
- Exposing plants to strong winds on the first few days.
- Waiting weeks after hardening off before transplanting.
- Overfertilizing immediately before planting.
- Crowding seedlings together so airflow is poor.
Even healthy seedlings can suffer transplant shock if rushed through the process.
Troubleshooting & Common Problems
| Problem | Likely Cause | Solution |
| Leaves turn white | Sunscald | Move plants back to shade and restart gradual sun exposure. |
| Seedlings wilt quickly | Too much sun or wind | Reduce outdoor time and water if needed. |
| Purple leaves | Cold temperatures | Wait for warmer weather before continuing. |
| Broken stems | Strong wind | Use a sheltered location until stems strengthen. |
| Slow growth | Hardening off too early or poor weather | Extend the schedule several more days. |
| Dry soil every afternoon | Small containers drying rapidly | Check moisture more often and water when necessary. |
| Yellow leaves | Overwatering or stress | Allow soil to dry slightly and improve drainage if needed. |
Expert Tips
- Begin hardening off about one week before your planned transplant date.
- Rotate trays daily so every seedling receives even sunlight.
- Use morning sun before introducing afternoon exposure.
- Raise containers off hot concrete using a table or bench.
- Group seedlings together during windy weather to reduce moisture loss.
- Water early in the morning so plants remain hydrated throughout the day.
- Delay transplanting if an unexpected cold front or heat wave is forecast.
- Label different plant varieties so each receives appropriate care based on its temperature tolerance.
- If you miss a day, simply continue the schedule rather than starting over, unless seedlings experienced severe stress.
- Remember that weather matters more than the calendar; adjust your schedule to match actual outdoor conditions.
When to Call a Professional
For most home gardeners, hardening off seedlings is a straightforward DIY task. However, there are situations where expert advice can save time and prevent crop loss.
Consider contacting a local nursery, garden center, or extension service if:
- Your seedlings repeatedly die despite following a hardening-off schedule.
- You suspect a disease rather than transplant shock.
- Your plants were damaged by an unexpected frost or hailstorm.
- You’re growing high-value plants in large quantities.
- You need region-specific advice about transplant timing and local climate conditions.
For commercial growers or gardeners starting hundreds of seedlings, investing in a cold frame or greenhouse system may also be worthwhile.
What to Do Next
Once your seedlings are fully hardened off:
- Transplant them into their permanent location as soon as possible.
- Water thoroughly after planting to help settle the soil around the roots.
- Apply mulch (if appropriate) to conserve moisture and regulate soil temperature.
- Monitor plants daily during their first week outdoors.
- Protect newly transplanted seedlings from unexpected cold snaps, strong winds, or intense heat if necessary.
- Continue watering consistently until plants become well established.
The first week after transplanting is just as important as the hardening-off process. Regular observation allows you to catch minor problems before they become serious.
FAQs
1. How long does it take to harden off seedlings?
Most seedlings need 7–10 days. Some tender plants may benefit from a few extra days if the weather is unusually cold, windy, or hot.
2. Can I skip hardening off seedlings?
Skipping hardening off greatly increases the risk of transplant shock, leaf scorch, stunted growth, and plant loss. Even hardy vegetables perform better after gradual outdoor exposure.
3. What happens if my seedlings wilt during hardening off?
Mild wilting can be normal, especially on warm afternoons. Severe or prolonged wilting usually means the plants were exposed to too much sun, wind, or heat too quickly. Move them back to shade and slow the schedule.
4. Can seedlings stay outside overnight?
Only after they’ve successfully spent several full days outdoors and nighttime temperatures are suitable for the crop. Never leave tender seedlings outside if frost is possible.
5. Which plants need hardening off the most?
Warm-season crops such as tomatoes, peppers, cucumbers, squash, eggplants, basil, and many annual flowers are especially sensitive to sudden outdoor conditions.
6. Should I water seedlings every day while hardening off?
Not necessarily. Check the soil daily and water when the top layer begins to dry. Outdoor containers often dry faster than indoor ones, especially on sunny or windy days.
7. Can cloudy weather replace hardening off?
No. Although cloudy days reduce sun stress, seedlings still need time to adapt to changing temperatures, airflow, and natural outdoor conditions.
8. Is direct afternoon sun safe during hardening off?
Not at first. Introduce morning sun before gradually increasing exposure to stronger afternoon sunlight over several days.
9. What temperature is too cold for hardening off?
It depends on the crop. Tender vegetables generally shouldn’t be exposed to temperatures below 50°F (10°C) for extended periods, while cool-season crops tolerate lower temperatures better.
10. Should I fertilize seedlings before transplanting?
Avoid heavy fertilizing during the final days of hardening off. Too much nitrogen encourages soft, tender growth that is more easily damaged outdoors.
Final Thoughts
Hardening off seedlings may seem like a small step, but it plays a major role in successful gardening. Giving young plants time to adjust to sunlight, wind, temperature changes, and outdoor humidity reduces transplant shock and encourages stronger, healthier growth.
Instead of following a rigid schedule, pay close attention to your seedlings and the weather. Healthy plants respond better when you adjust the process to real conditions rather than simply counting days. With a little patience, you’ll give your vegetables, herbs, and flowers the best possible start in the garden.
Image Prompts
Featured Image Prompt
Prompt:
A bright backyard vegetable garden with a gardener carrying healthy seedling trays from indoors to an outdoor planting table. Several young tomato, pepper, lettuce, and herb seedlings are arranged in biodegradable pots under gentle morning sunlight. The background features raised garden beds, lush spring greenery, gardening tools, and a watering can. Ultra-realistic photography, natural lighting, shallow depth of field, vibrant green foliage, professional gardening magazine style, highly detailed, 16:9 aspect ratio, no people visible above the shoulders, no text, no logos, no watermark. Add watermark: “Howvora.com” in the bottom-right corner.
Introduction Image Prompt
Prompt:
Side-by-side comparison of indoor-grown seedlings next to healthy outdoor-hardened seedlings. Indoor plants appear softer and lighter green, while hardened seedlings have thicker stems and darker leaves. Bright natural lighting, realistic home gardening environment, professional editorial photography, 16:9 aspect ratio, ultra-detailed, no text, watermark: “Howvora.com”.
Before You Begin Image Prompt
Prompt:
A neatly organized gardening workstation displaying healthy seedling trays, watering can, garden gloves, plant labels, small trowel, thermometer, weather forecast on a tablet, and biodegradable pots on a wooden table outdoors. Soft morning sunlight, realistic photography, clean composition, premium gardening magazine style, 16:9 ratio, watermark: “Howvora.com”.
Step-by-Step Guide Image Prompt
Prompt:
A sequence-style gardening scene showing seedlings gradually hardening off outdoors over several days from full shade on day one to partial sun and finally full sunlight. Healthy green seedlings in trays, calm spring weather, realistic backyard garden, ultra-realistic photography, educational editorial style, natural lighting, 16:9 aspect ratio, no text, watermark: “Howvora.com”.
Meta Description
Character Count: 150 characters
Meta Description:
Learn how to harden off seedlings the right way with this step-by-step guide to reduce transplant shock and grow stronger, healthier plants outdoors.
