Introduction
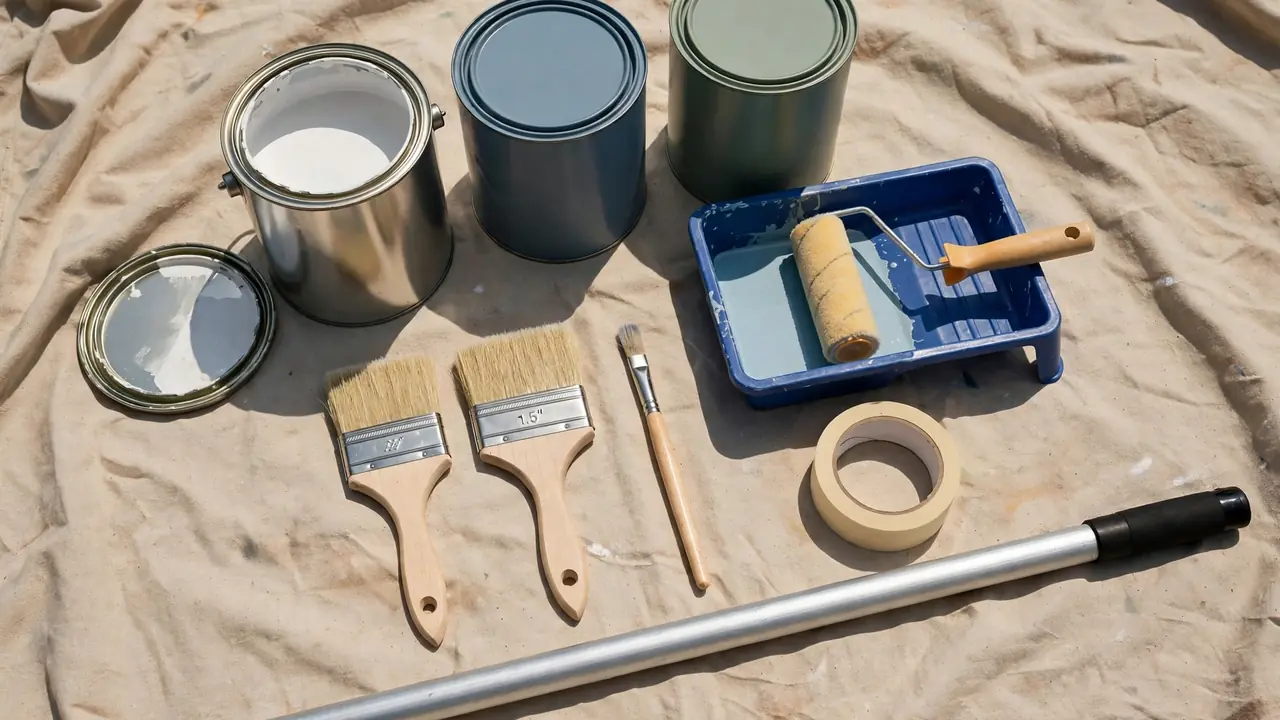
A fresh coat of paint is the fastest, cheapest way to change how a room feels, and it is a job almost anyone can finish in a single weekend. Paint a room well and the walls look smooth and the edges look sharp. Paint it badly and you see roller marks, drips, and old color bleeding through for years. The difference is rarely talent. It is preparation and order: the edges get cut in first, and the rolling follows a pattern.
This guide gives you that order, step by step, for a standard bedroom or living room. You will learn how much paint to buy, which sheen to pick, when primer is truly needed and when it is a waste of money, and how professionals avoid lap marks and flashing.
Featured Snippet Answer
To paint a room, clear and cover the space, repair and clean the walls, tape the trim, and prime any bare, stained, or glossy areas. Cut in around the edges with a brush, then roll the walls in W-shaped strokes, keeping a wet edge. Let the first coat dry fully, then apply a second coat.
Before You Begin

Measure the room before you buy anything. Multiply each wall’s length by the ceiling height and add the totals. A standard gallon of paint covers roughly 350 to 400 square feet per coat,. A 12 by 12 foot room with 8 foot ceilings has about 380 square feet of wall, so plan on two gallons for two coats.
Pick your sheen by room, not by taste alone. Flat and matte finishes hide wall flaws best and suit ceilings and low-traffic bedrooms. Eggshell and satin hold up to light cleaning. Semi-gloss resists moisture and scrubbing, which makes it the practical choice for kitchens, bathrooms, and trim.
Decide on primer honestly. Primer is essential on new drywall, bare wood, stained areas, and glossy surfaces that paint will not grip. If you paint over a similar color on a clean, sound wall, a quality paint-and-primer product applied in two coats is usually enough, and a separate primer coat adds cost for little gain.
At a Glance

| Detail | What to know |
|---|---|
| Difficulty | Easy to moderate; the work is simple, the prep is tedious |
| Time needed | 4 to 8 hours of work spread over 1 to 2 days, including drying time |
| Cost | $100 to $300 for paint and supplies for one average room |
| Skill level | Beginner; no experience needed |
| Best for | Previously painted interior walls in sound condition |
Things You’ll Need
| Item | Purpose |
|---|---|
| Interior latex paint | The finish coats; buy it all at once so the batch matches |
| Primer | Seals bare drywall, stains, and glossy surfaces so the topcoat grips and covers |
| Painter’s tape | Masks trim, ceilings, and outlets for clean edges |
| Drop cloths (canvas preferred) | Protect floors and furniture; canvas stays put and absorbs drips |
| 9-inch roller frame and covers | Covers open wall areas; 3/8-inch nap for smooth walls, 1/2-inch for light texture |
| 2 to 2.5-inch angled brush | Cuts in edges, corners, and trim a roller cannot reach |
| Roller tray and liners | Holds paint and loads the roller evenly |
| Extension pole | Rolls full wall height with even pressure, no ladder for most strokes |
| Spackle and a putty knife | Fills nail holes and small dents before painting |
| 120-grit sandpaper or sanding sponge | Smooths patched spots and dulls glossy areas |
| 5-in-1 painter’s tool | Opens cans, scrapes loose paint, and cleans rollers |
| Stir sticks and a paint can opener | Mixes settled paint and opens lids without bending them |
| Step ladder | Reaches ceiling lines and high corners safely |
| Mild cleaner or degreaser | Removes grease and grime so paint bonds |
Safety Precautions
- Ventilate the room. Modern latex paints are low in fumes, but you should still open windows and run a fan. Oil-based primers and paints need steady fresh air the whole time.
- Keep paint and solvents away from open flames. Oil-based products and their thinners are flammable. Store them away from water heaters, furnaces, and stoves.
- Use the ladder correctly. Set it on a level floor, lock the spreaders, and never stand on the top cap or lean past the rails. Move the ladder instead of overreaching.
- Protect your eyes and skin during sanding and scraping. Wear eye protection, and wear a dust mask when you sand patched areas or scrape old paint.
- Stop and test if the house was built before 1978. Old paint may contain lead. Do not sand or scrape suspect paint until it has been tested, and follow local rules for lead-safe work.
- Dispose of oily rags safely. Rags soaked in oil-based paint or thinner can self-ignite. Lay them flat outdoors to dry fully, or store them submerged in water in a sealed metal can.
Step-by-Step Guide
- Step 1: Clear the room and protect what stays. Remove small furniture, wall art, and outlet covers. Push large pieces to the center and cover them. Lay drop cloths over the whole floor and tape them lightly at the baseboards so they cannot slide.
- Step 2: Repair the walls. Pull stray nails, fill holes and dents with spackle, and press it flat. Scrape any peeling or bubbling paint back to a firm edge.
- Step 3: Sand the patches and clean everything. When the spackle is dry, sand it flush with 120-grit paper and feather the edges. Wipe the walls with a damp cloth to remove dust. Wash kitchen and bathroom walls with a mild degreaser, since cooking film and hairspray residue cause peeling.
- Step 4: Tape the trim, ceiling line, and fixtures. Press painter’s tape firmly along baseboards, window and door trim, and the ceiling edge, sealing it with a putty knife. Remove outlet and switch plates instead of taping around them, and tape over the outlets themselves.
- Step 5: Prime where the surface needs it. Roll or brush primer on new drywall, patched areas, stains, and any surface that felt glossy. Spot-priming patches alone can leave visible dull spots, called flashing, so prime the whole wall if you patched heavily. Let the primer dry for the time on the can, usually about an hour.
- Step 6: Stir the paint and set up your tray. Stir each can thoroughly, scraping the bottom, then pour paint into the tray well. If you bought several gallons of the same color, mix them together in one large bucket, a step painters call boxing. It evens out any small tint differences between cans.
- Step 7: Cut in the edges with the brush. Using the angled brush, paint a band about 2 to 3 inches wide along the ceiling line, corners, and around all trim. Load the brush about a third of the way up the bristles, tap off the excess, and draw a steady line with the brush edge. Cut in one wall at a time so the band stays wet when you roll into it.
- Step 8: Roll the wall in a W pattern. Load the roller, roll off the excess, and apply paint in a W or M shape about 3 feet square. Fill in the shape with parallel strokes, then finish with long, light top-to-bottom passes. Rolling back into the wet cut-in band blends brush and roller texture into one finish.
- Step 9: Keep a wet edge and work wall to wall. Always roll into paint that is still wet. Plan your path to finish each wall without stopping, and keep the roller loaded consistently; a starved roller leaves thin, streaky coverage.
- Step 10: Let the first coat dry, then inspect it. Latex paint usually feels dry to the touch in about an hour but needs roughly 4 hours before recoating; the can label is the authority for your product. Check the wall with a work light held at an angle; raking light exposes drips and thin spots flat light hides.
- Step 11: Sand lightly if needed and apply the second coat. Knock down any drips or rough spots with fine sandpaper, wipe off the dust, and repeat the cut-in and roll sequence. Two coats give you the true color, even sheen, and a surface that survives washing.
- Step 12: Remove the tape and touch up. Pull the tape while the final coat is still slightly wet, pulling slowly at a 45-degree angle away from the painted surface. Touch up any slips, replace the outlet covers, and move furniture back once the paint has cured.
How to Know You Did It Correctly
Check the walls in daylight and under the room’s normal lighting. The color should look identical in both, with no stripes, shiny bands, or dull patches. Edges along the ceiling line and trim should be straight, with no paint on the trim and no gaps. The cut-in bands should be invisible, with brush and roller areas sharing the same texture.
Expected Timeline and Results
For one average room, plan on 2 to 3 hours of prep, about an hour per coat of rolling and cutting in, and 4 hours of drying between coats. The result is a room that looks professionally done and holds up for 5 to 10 years before it needs repainting. Note the difference between dry and cured: latex paint dries in hours but takes about 30 days to cure to full hardness, so treat the walls gently for the first few weeks.
Alternative Methods
A paint sprayer lays down a very smooth finish with no roller texture and covers large or empty spaces fast. The trade-offs are heavy masking, drifting overspray, and a learning curve. For a single furnished room, a roller is almost always quicker once masking time is counted. Paint-and-primer-in-one products are a second alternative: they work well for color refreshes over sound paint, but they do not replace a real primer on bare drywall, stains, or glossy surfaces.
Common Mistakes to Avoid
- Skipping the wall repairs and cleaning. Paint highlights holes, grease, and dust, then peels away from them.
- Painting the second coat too soon. Recoating before the label’s dry time traps moisture, causes wrinkles and drag marks, and can pull the first coat off.
- Letting the cut-in band dry before rolling. A dry brush band next to fresh rolled paint leaves a framed picture effect.
- Overloading or starving the roller. Too much paint drips and leaves ridges; too little leaves holidays, or missed thin spots.
- Leaving tape on for days. Tape left until paint fully hardens bonds to the film and tears it. Pull it while the last coat is fresh.
- Buying the cheapest brushes and roller covers. Bargain covers shed lint into the finish and bargain brushes leave splayed marks.
Troubleshooting & Common Problems
| Problem | Cause | Solution |
|---|---|---|
| Roller marks and lap lines | The edge dried before you overlapped it, or the roller was unevenly loaded | Keep a wet edge, work in smaller sections, and sand severe marks lightly between coats |
| Old color or patches showing through (flashing) | No primer over patches, stains, or a strong old color | Spot-prime the dull areas or prime the whole wall, then recoat; stain-blocking primer handles water and smoke stains |
| Drips and runs on the wall | Too much paint in one pass, especially at edges | Brush out runs while wet. If dried, sand the drip flush, wipe dust, and touch up with a light coat |
| Paint peeling soon after drying | Paint applied over grease, dust, or a glossy surface without sanding or primer | Scrape loose paint, degrease, sand to dull the surface, prime, and repaint |
| Tape pulling paint off the wall | Tape left on until paint fully hardened, or tape applied over fresh paint | Score the edge with a utility knife and pull slowly at 45 degrees; repaint the damaged strip with a brush |
| Brush lines visible in cut-in areas | Brush too dry or paint starting to set before rolling | Cut in smaller sections, keep the band wet, and roll into it right away so textures merge |
Expert Tips
- Take the room’s light temperature into account. Paint color shifts under warm bulbs versus daylight. Test your color with a large sample square on two walls and live with it for a day first.
- Strain older paint through a nylon stocking or a mesh strainer.
- Wrap your brush and roller in plastic wrap during breaks. Sealed tightly, they stay wet for hours, even overnight in the refrigerator.
- Roll ceilings first, then walls top to bottom. Wall paint then covers any ceiling spatter, not the reverse.
- Label leftover paint with the room and date, and store a small jar for touch-ups.
When to Call a Professional
Hire a painter if your ceilings are very high or the room includes a stairwell. Call a professional for walls with widespread peeling, water damage, or suspected lead paint in an older home, and for heavy drywall repair. It is also the right call if the room must be finished fast: a crew can prep and paint in a day what takes a homeowner a weekend,
What to Do Next
Let the paint cure before you hang pictures or push furniture tight against the walls; full cure takes about 30 days. Save the labeled leftover paint, color name, and sheen in your phone for future touch-ups.
FAQs
How much paint do I need for one room?
A gallon covers about 350 to 400 square feet per coat. An average 12 by 12 foot room usually needs two gallons for two coats on the walls, with a little left for touch-ups.
Do I really need two coats?
In almost every case, yes. The first coat seals and builds the base color; the second evens out sheen and coverage.
Can I skip primer?
You can skip a separate primer coat when you paint over clean, sound paint in a similar color using a quality paint. You cannot skip it on new drywall, bare wood, stains, patched walls, or glossy surfaces,.
How long should I wait between coats?
Follow the can label. Most latex paints need about 4 hours before recoating, even though they feel dry to the touch in about an hour.
Which sheen is best for a living room?
Eggshell or satin. Both resist light scuffs and can be wiped clean, and they stay forgiving of minor wall flaws.
How do I avoid paint on the trim?
Tape carefully, seal the edge with a putty knife, then cut in with an angled brush. Some painters skip tape on trim entirely and rely on brush control, but tape is the safer route for beginners.
When can I put furniture back?
Move furniture back after a day, but keep a small gap from the walls for two weeks while the paint cures.
Final Thoughts
Painting a room rewards patience in the unglamorous stages: patching, sanding, washing, and taping decide how the glamorous stage looks. Follow the order in this guide, keep a wet edge, respect the drying times on the can, and give the walls two full coats. Do that, and your weekend project will look like a professional job every time you walk into the room.