
Boiling corn on the cob means waiting for a full pot of water to come to a rolling boil, then babysitting it so the ears don’t overcook. The microwave skips both problems. It cooks each ear in its own husk, traps in moisture, and gets you from raw corn to a hot, tender ear in under five minutes with almost no cleanup.
This method works whether you’re cooking one ear for a quick lunch or four ears for a weeknight dinner, and it’s ideal for anyone who wants sweet corn without turning on the stove.
Featured Snippet
Leave the husk on, microwave each ear on high for 3–4 minutes (add 2 minutes per additional ear), let it rest 1–2 minutes to avoid steam burns, then cut off the stalk end and squeeze; the corn slides out clean, silk-free.
At a Glance
| Difficulty | Time | Cost | Skill Level | Best For |
| Very Easy | 5–12 minutes | Free (no extra tools) | Beginner | 1–4 ears, quick meals, small households |
Things You’ll Need
| Item | Purpose |
| Fresh corn on the cob, husk on | The husk steams the kernels and holds in moisture |
| Microwave-safe plate | Catches any liquid that seeps out during cooking |
| Oven mitt or kitchen towel | Protects your hands from steam and hot husk |
| Sharp knife | Cuts off the stalk end after cooking |
Step-by-Step Guide
- Leave the husk and silk on. Don’t shuck the corn first; the husk acts as a natural steaming pouch, so removing it dries out the kernels and risks scorched spots.
- Trim the stalk end if it’s long. If more than an inch of stalk sticks out past the husk, snip it so the ear fits flat in the microwave.
- Place the ear on a microwave-safe plate. No wrapping, water, or plastic needed; the husk handles the moisture on its own.
- Microwave on high for 3–4 minutes per ear. For multiple ears cooked together, add about 2 minutes for each additional ear (4 ears typically nneed9–12 minutes total). Times vary by microwave wattage, so check the first ear before assuming the rest are done.
- Let it rest for 1–2 minutes before touching it. The husk traps hot steam, and cutting into it immediately can cause a burn. This resting step is the one most people skip, and it’s the main reason for accidental steam burns.
- Cut off the stalk end. Once cool enough to handle, slice about half an inch off the wide, stalk end of the ear.
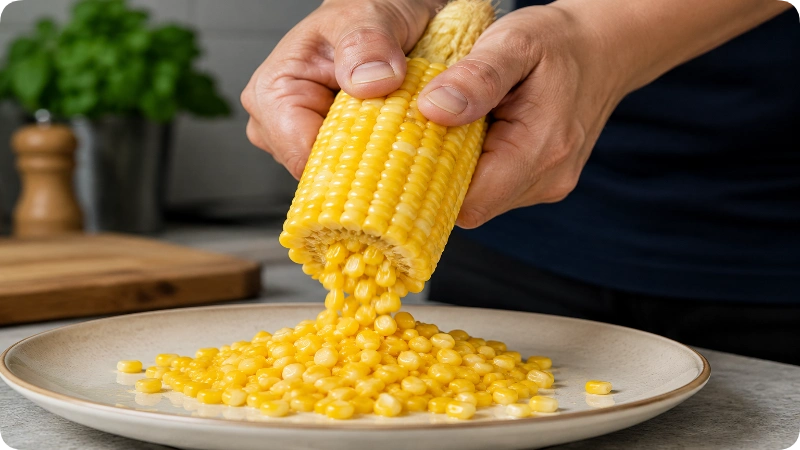
- Squeeze from the silk end. Hold the ear by the tassel (silk) end and squeeze; the cooked corn slides out through the cut end, leaving the husk and silk behind. This avoids picking silk strands off by hand.
How to Know You Did It Correctly
The kernels should look plump and bright yellow (or white, depending on variety), pierce easily with a fork, and taste sweet with a slight snap, not mushy or starchy. If you press a kernel and it feels firm with no give, it needs another 30–60 seconds.
Common Mistakes to Avoid
- Shucking before microwaving. This dries out the corn and leads to uneven, tough spots.
- Skipping the rest time. Cutting into the husk right away releases a burst of scalding steam.
- Guessing at time for multiple ears. Microwaves don’t scale linearly; doubling the ears doesn’t just double the time, but it does increase it, so check doneness on one ear before assuming the batch is ready.
- Using a microwave wattage you haven’t accounted for. Lower-wattage microwaves (700W or less) may need an extra minute per ear.
Expert Tips
- If your microwave has a turntable, corn cooks more evenly than in one without, since the ear isn’t sitting in one hot spot the whole time.
- For a quick flavor boost, rub the hot corn with butter mixed with a pinch of salt and chili powder right after husking; the residual heat melts it instantly.
- If you’re cooking corn ahead of time, slightly undercook it (by about 30 seconds) and finish it on a hot grill for a few minutes to add char without drying it out.
What to Do Next
Serve the corn hot with butter, salt, or your preferred toppings. If you have leftover cooked ears, cut the kernels off the cob and store them in an airtight container in the fridge for up to 3 days, or freeze for up to 6 months.
FAQs
Do I need to add water before microwaving corn?
No. The husk holds enough natural moisture to steam the corn on its own.
Can I microwave corn without the husk?
Yes, but wrap it tightly in a damp paper towel first, or the kernels will dry out and cook unevenly.
How long do I microwave 2 ears of corn?
Start with about 5–6 minutes total, then check doneness and add time in 30-second increments if needed.
Why did my corn husk catch fire or scorch?
This is rare and usually happens only with extended cook times well beyond what’s needed, or in microwaves with uneven heating. Stick to the recommended times and check the corn partway through if cooking more than 2 ears at once.
Can I microwave frozen corn on the cob?
Yes. Add 2–3 extra minutes per ear to account for the thawing time.
Final Thoughts
Microwaving corn on the cob is faster and less messy than boiling, and keeping the husk on is the detail that makes it work; it steams the kernels from the inside out without any added water. Once you’ve timed it for your own microwave’s wattage, it becomes a reliable go-to method for getting fresh, tender corn on the table in minutes.
