A smash burger lives or dies by timing. Leave the patty on the griddle too long, and you get a dry, gray hockey puck. Pull it too early, and the signature crust never forms. This guide gives you the exact timing for every stage of cooking a smash burger, from the moment the ball of beef hits the heat to the second the cheese finishes melting, so you get a lacy, caramelized crust and a juicy center every time.
This is for home cooks working with a griddle, cast-iron skillet, or flat-top grill who want restaurant-quality results without guesswork. By the end, you’ll know how long to smash, how long to sear, and how to tell doneness by sight instead of relying on a clock alone.
Featured Snippet
Cook smash burgers for 90 seconds to 2 minutes per side over high heat (400–450°F). Smash immediately after placing the patty, sear undisturbed for the full time on side one, flip once, add cheese, and cook 60–90 seconds more. Total cook time: about 3–4 minutes per patty.
At a Glance
| Category | Details |
| Difficulty | Easy |
| Total time | 3–4 minutes per patty (plus prep) |
| Cost | $3–$6 per burger (ingredients) |
| Skill level | Beginner-friendly |
| Best for | Weeknight dinners, quick lunches, feeding a crowd fast |
Choosing the Right Approach
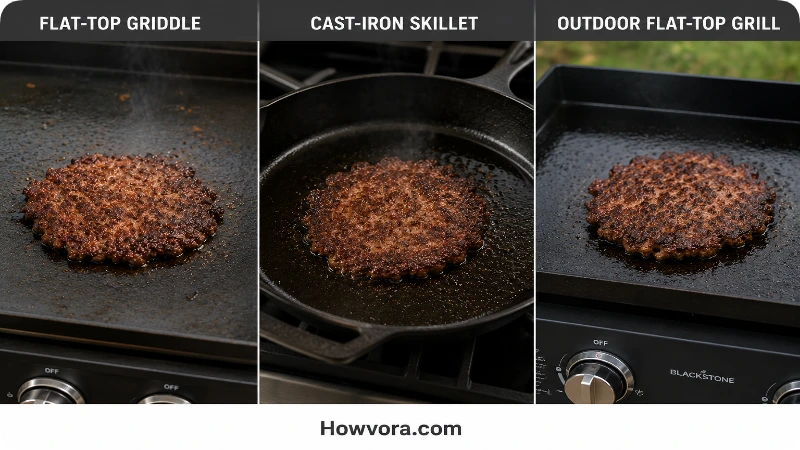
Smash burgers cook slightly differently depending on your surface. Timing is similar across all three, but heat retention changes how forgiving each method is.
| Method | Heat Source | Typical Sear Time (Side 1) | Notes |
| Flat-top griddle | Direct, even, high heat | 90 seconds | Best crust, most consistent results |
| Cast-iron skillet | Direct, retains heat well | 90 seconds–2 minutes | Great substitute if you don’t own a griddle |
| Outdoor flat-top grill | Direct can run hotter | 60–90 seconds | Watch closely, edges burn fast at high heat |
A traditional grill grate isn’t recommended for true smash burgers. The patty needs full, flat contact with a hot surface to form the crust; grates let too much of the meat’s surface escape direct heat.
Things You’ll Need
| Item | Purpose |
| Ground beef (80/20 blend) | Enough fat renders to create the crust without drying out |
| Flat griddle, cast-iron skillet, or flat-top grill | Provides the even, high-heat smashing required |
| Sturdy metal spatula or bacon press | Flattens the patty and scrapes up the crust when flipping |
| Parchment paper or a sheet of plastic wrap | Prevents the meat from sticking to the smashing tool |
| Instant-read thermometer | Confirms internal temperature without guessing |
| Kitchen scale (optional) | Keeps patty sizes consistent for even cook times |
Safety Precautions
Ground beef carries a higher risk of bacterial contamination than whole cuts because grinding mixes surface bacteria throughout the meat. Because smash burgers are thin and cook fast, it’s easy to misjudge doneness by color alone.
- Cook ground beef to a minimum internal temperature of 160°F (71°C), checked with an instant-read thermometer inserted into the thickest part of the patty.
- Don’t rely on color as your only doneness check. Thin, fast-cooked patties can look done on the outside while staying under temperature inside.
- Wash hands, utensils, and surfaces that have touched raw beef before they contact any other food.
- Keep raw beef refrigerated until just before cooking; thin patties warm to room temperature quickly, which increases the risk of bacterial growth.
Step-by-Step Guide
- Portion the beef. Divide ground beef into loose balls, about 3–4 oz each. Don’t compact them; a loosely packed ball smashes more evenly and stays tender.
- Preheat the surface. Heat your griddle or skillet to 400–450°F. It’s hot enough when a drop of water skitters and evaporates in 1–2 seconds. Skipping this step is the most common reason patties steam instead of sear.
- Place and smash immediately. Set the ball on the hot surface, lay parchment or plastic wrap on top, and press firmly with a spatula or bacon press until the patty is about ¼ inch thick. Smash within seconds of placing it; waiting lets the exterior start cooking unevenly before it’s flattened.
- Sear side one, undisturbed, for 90 seconds to 2 minutes. Don’t move, press, or peek. Moving the patty tears the crust that’s forming. You’ll see the edges turn brown and slightly crisp, and juices will bead on the top surface.
- Flip once. Use a thin, sturdy spatula to scrape fully under the crust in one motion. A clean flip keeps the crust intact instead of leaving it stuck to the pan.
- Add cheese immediately after flipping (if using). The residual heat plus 60–90 seconds of cook time is enough to fully melt a thin slice.
- Cook side two for 60–90 seconds, or until the internal temperature reads 160°F on an instant-read thermometer.
- Rest for 30–60 seconds on a bun or plate before serving. This short rest lets juices redistribute instead of running out the moment you bite in.
How to Know You Did It Correctly
- The exterior has a deep brown, lacy crust with crispy edges, not a uniform gray-brown color.
- An instant-read thermometer reads 160°F or higher at the center.
- The patty is thin and wide, roughly double its original diameter, with slightly ragged, crispy edges.
- Juices run clear to light pink-tan, not bright red.
- The center is tender and moist, not dry or crumbly.
Expected Timeline and Results
Total active cook time runs 3–4 minutes per patty once the surface is preheated. Preheating itself takes 5–8 minutes depending on your equipment. For multiple burgers, cook in batches that fit your surface without crowding; crowding drops the surface temperature and stretches sear time, which weakens the crust.
Alternative Methods
- Two-patty smash stack: Use two smaller 2-oz balls per burger instead of one 3–4-oz ball. Sear time drops to about 60–75 seconds per side since the patties are thinner, giving more crust relative to meat.
- Butter or oil-assisted sear: Add a thin layer of butter or high-smoke-point oil before placing the patty. This slightly speeds up crust formation and adds flavor, but requires watching closely since fat can cause faster browning at the edges.
- Cheese-skirt method: Add cheese directly to the hot surface around the patty in the last 60 seconds so it crisps into a lacy edge that wraps the burger. Timing for the beef itself stays the same.
Common Mistakes to Avoid
- Overworking the meat during portioning. Compacting the ball too tightly makes for a denser, tougher patty.
- Smashing too thin or too thick. Under ¼ inch cooks too fast and dries out; over ⅓ inch won’t develop enough crust in the time frame.
- Flipping more than once. Multiple flips prevent a full crust from forming on either side.
- Cooking on a surface that isn’t hot enough. Low heat causes the patty to steam instead of sear, resulting in a gray, flabby exterior.
- Crowding the cooking surface. Too many patties at once drop the temperature and increase total cook time, which dries out the meat.
Troubleshooting & Common Problems
| Problem | Cause | Solution |
| Patty is gray, not browned | The surface wasn’t hot enough before smashing | Preheat longer; test with a water-drop sizzle test before adding meat |
| Crust sticks and tears when flipping | Flipped too early, before the crust fully set | Wait the full sear time; scrape under the entire patty in one motion |
| The burger is dry | Overcooked past 160°F, or patty smashed too thin | Use a thermometer and pull at 160°F; smash to closer to ⅓ inch |
| Center is undercooked despite browned exterior | High heat browned the outside faster than the inside reached temp | Lower heat slightly and extend side-two time; always confirm with a thermometer |
| Cheese won’t melt in time | Cheese slice too thick or added too late | Use thin-sliced cheese and add it immediately after flipping |
Expert Tips
- Let portioned beef balls sit at room temperature for 5–10 minutes before cooking; ice-cold centers need extra time to reach 160°F, which risks overcooking the exterior.
- Season with salt right before or right after smashing, not while portioning. Salting too early draws out moisture and can make the patty denser.
- If your spatula doesn’t fully release the crust on the first scrape attempt, give it another 15–20 seconds before trying again rather than forcing it.
When to Call a Professional
This doesn’t apply to home cooking, but if you’re setting up a commercial flat-top for a food truck or restaurant menu, consult a commercial kitchen equipment technician to confirm your griddle reaches and holds 400–450°F evenly across the cooking surface before relying on these timings at scale.
What to Do Next
Once you’ve got the timing down, experiment with toppings, cheese types, and bun choices, or try the two-patty stack method for extra crust. Keep an instant-read thermometer on hand for every batch until judging doneness by sight becomes second nature.
FAQs
How long do you cook a smash burger on each side?
Sear side one for 90 seconds to 2 minutes without moving it, then flip once and cook side two for 60–90 seconds, or until it reaches 160°F internally.
What temperature should the griddle be for smash burgers?
400–450°F. A drop of water should sizzle and evaporate within 1–2 seconds when the surface is ready.
Can you cook smash burgers on medium heat?
Not effectively. Medium heat won’t sear fast enough, causing the patty to steam and turn gray instead of developing a crust.
How do I know when a smash burger is fully cooked?
Check with an instant-read thermometer; ground beef should reach 160°F internally. Visual cues include clear-to-tan juices and a firm, no-longer-pink center.
Why is my smash burger tough instead of crispy?
The beef was likely packed too tightly when portioned, or the patty was flipped more than once, disrupting crust formation.
Do smash burgers need to rest before serving?
A short 30–60-second rest helps juices settle, but because the patties are thin, extended resting isn’t necessary the way it is for thick steaks or burgers.
Final Thoughts
Smash burger timing comes down to high heat, a fast sear, and a single flip. Once your surface is properly preheated, 3–4 minutes total is all it takes to go from raw ground beef to a crispy-edged, juicy burger. Keep a thermometer nearby until the visual cues become familiar, and you’ll have consistent results every time.